Installing a Hardpoint in a Terraced House

A few weeks ago, I went to a new client’s house to measure up for a hardpoint in their living room. It will be used for rope bondage and similar suspensions.

The first step is to get access to the joists in the ceiling. Since the living room was on the first floor, I was able to gain access through the loft. Being a late Victorian building, the joists up there were hefty and solid, and didn’t need much reinforcement. Armed with my measurements, I headed for the workshop where I would fabricate a bracket.

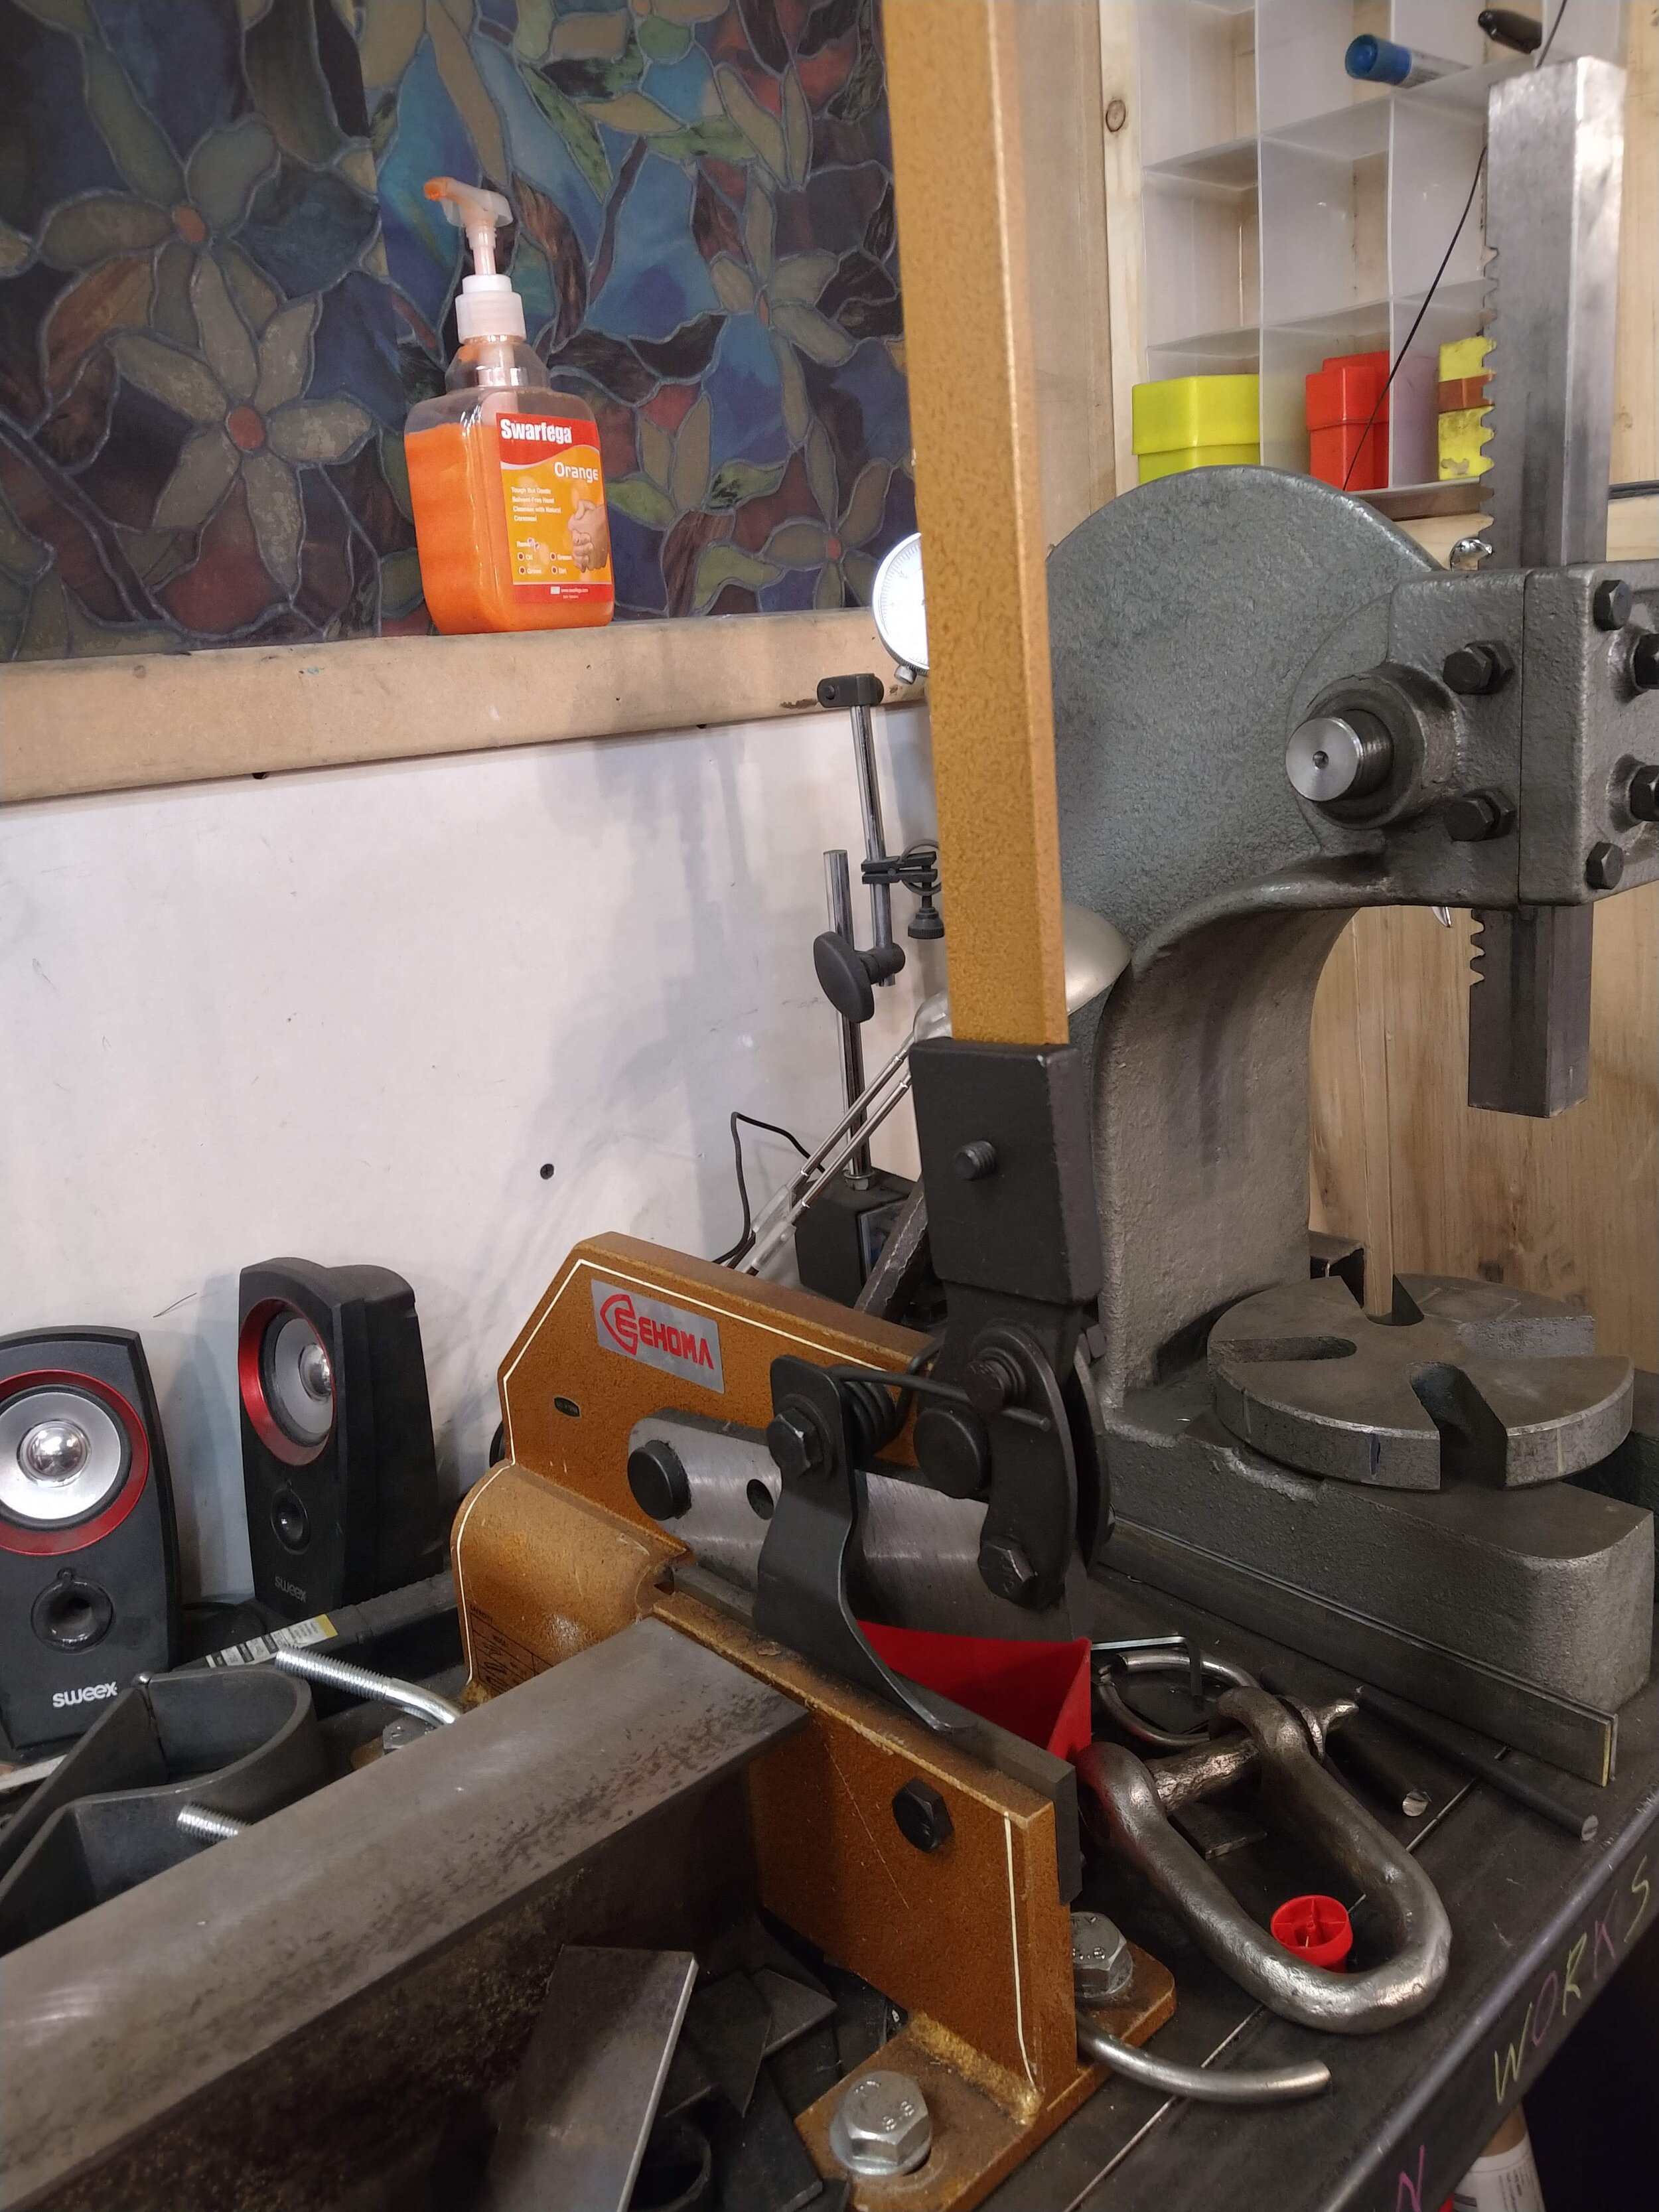
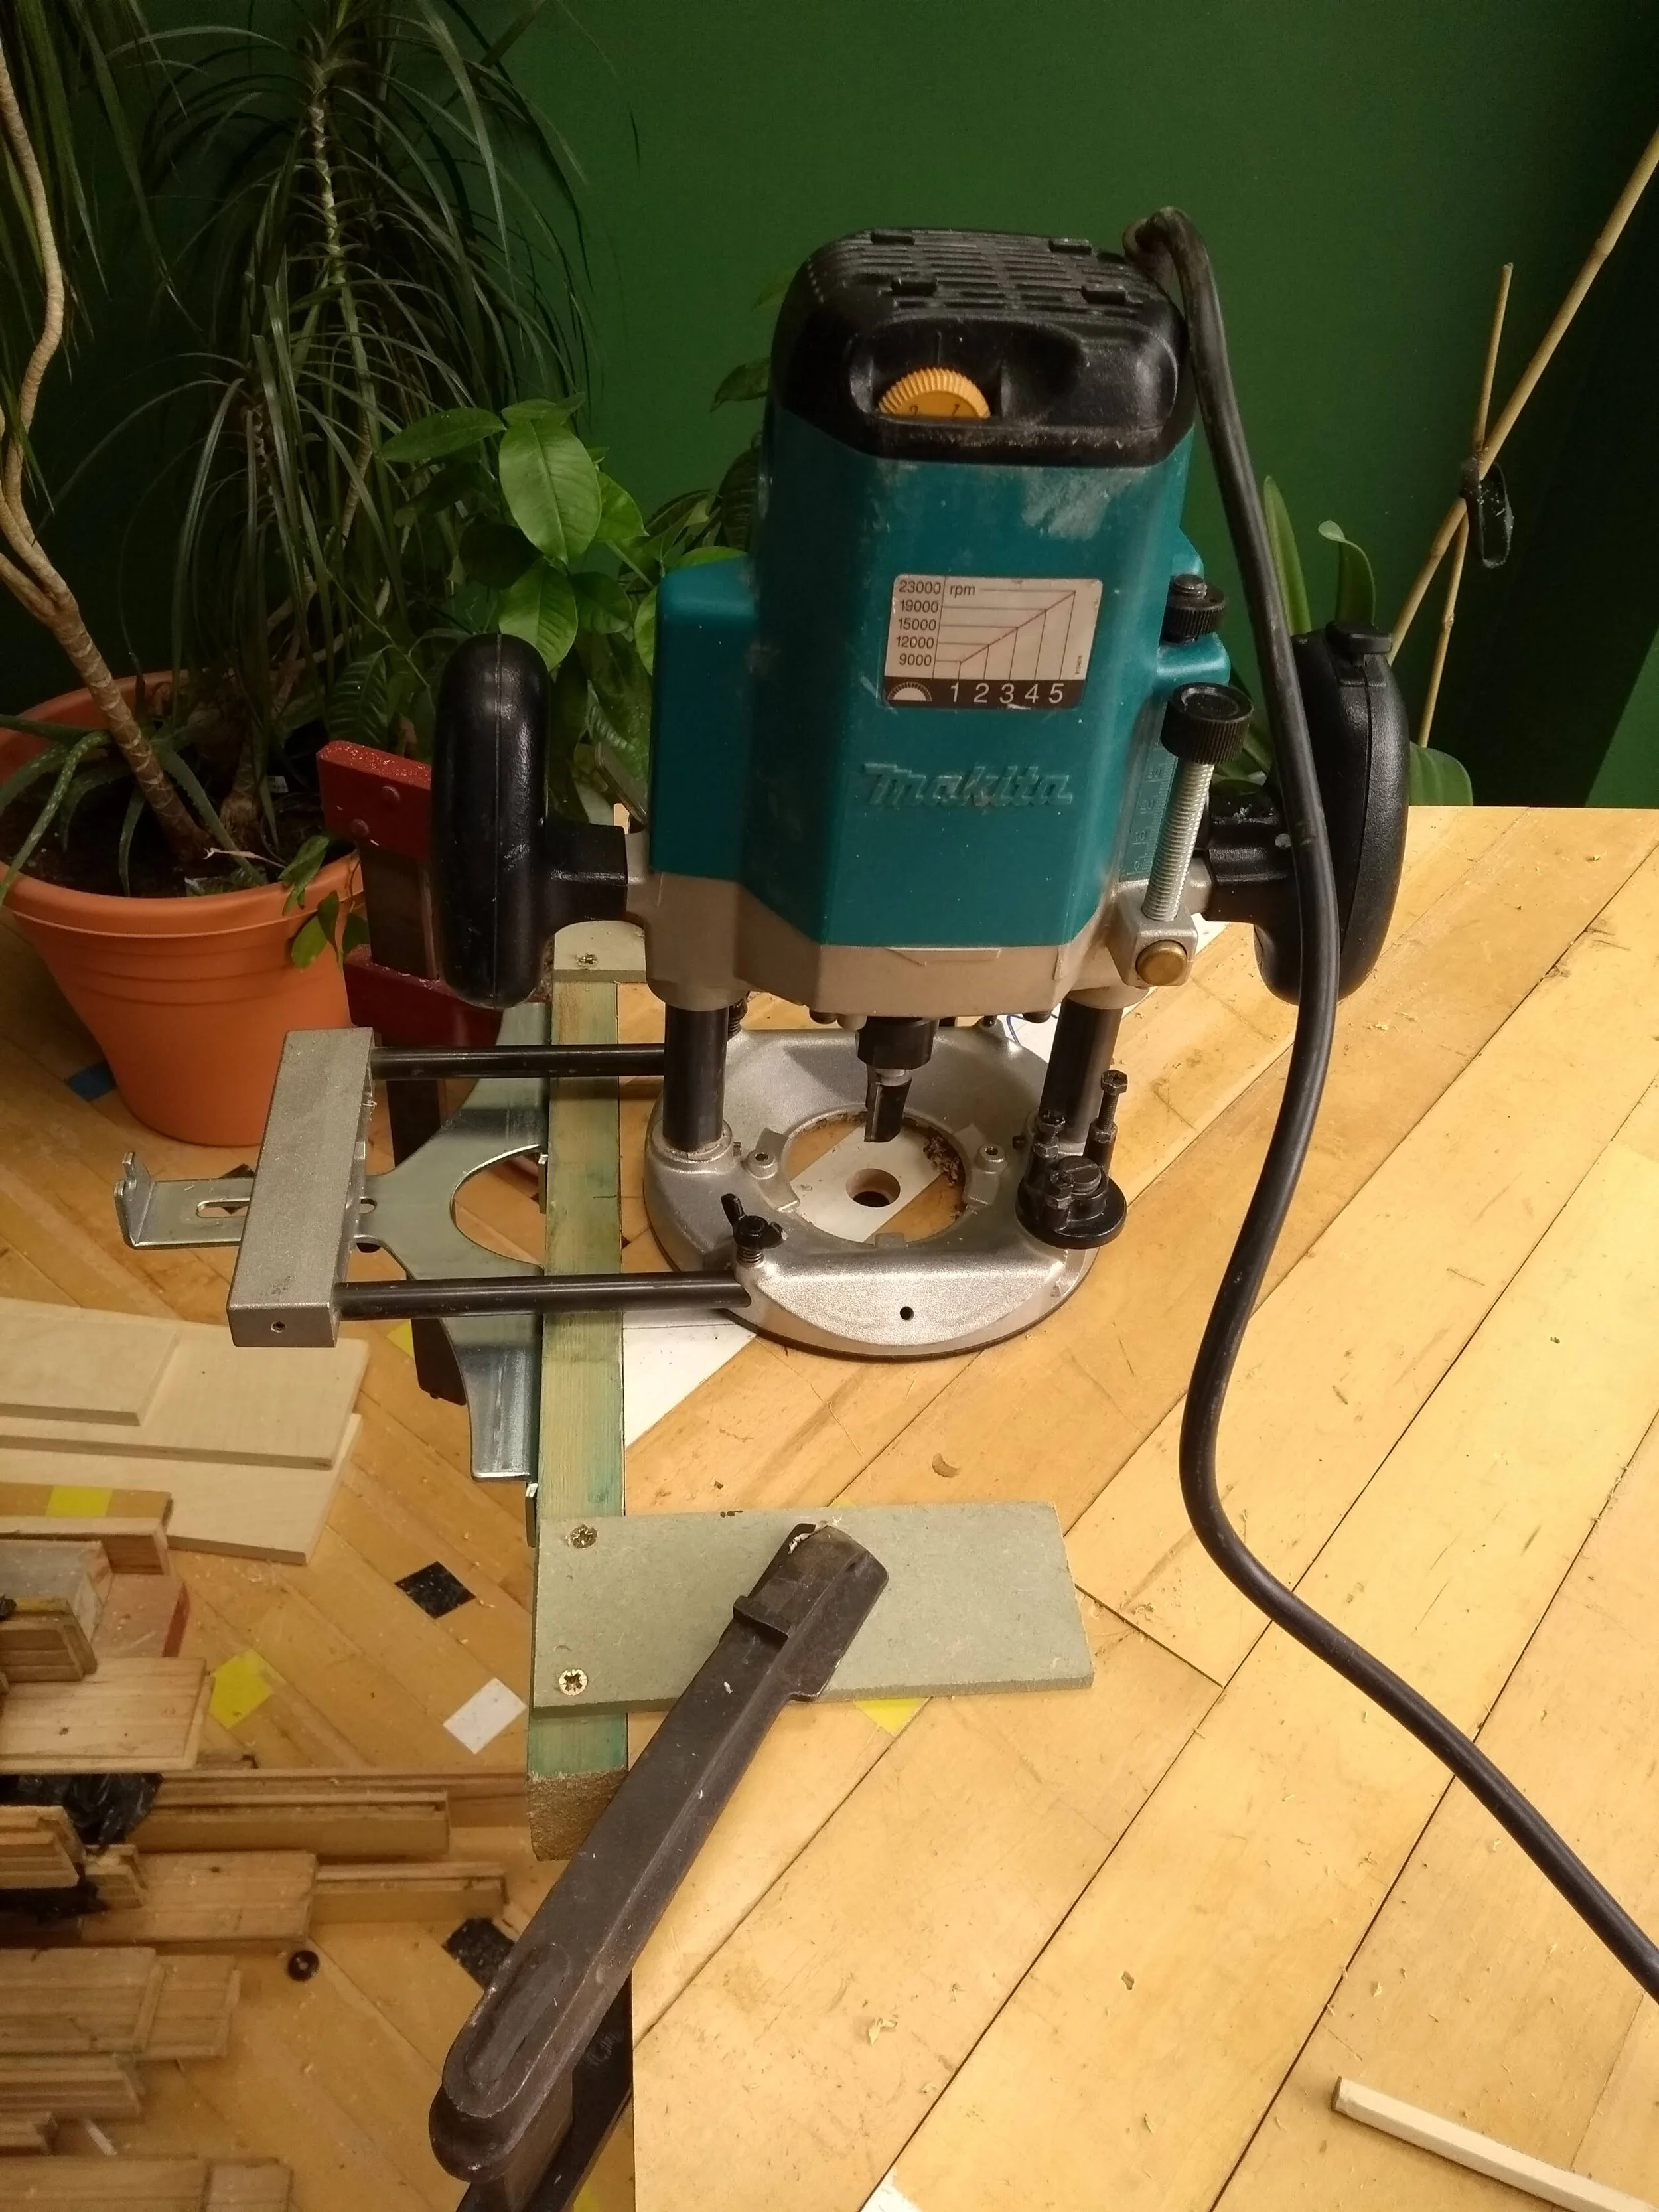
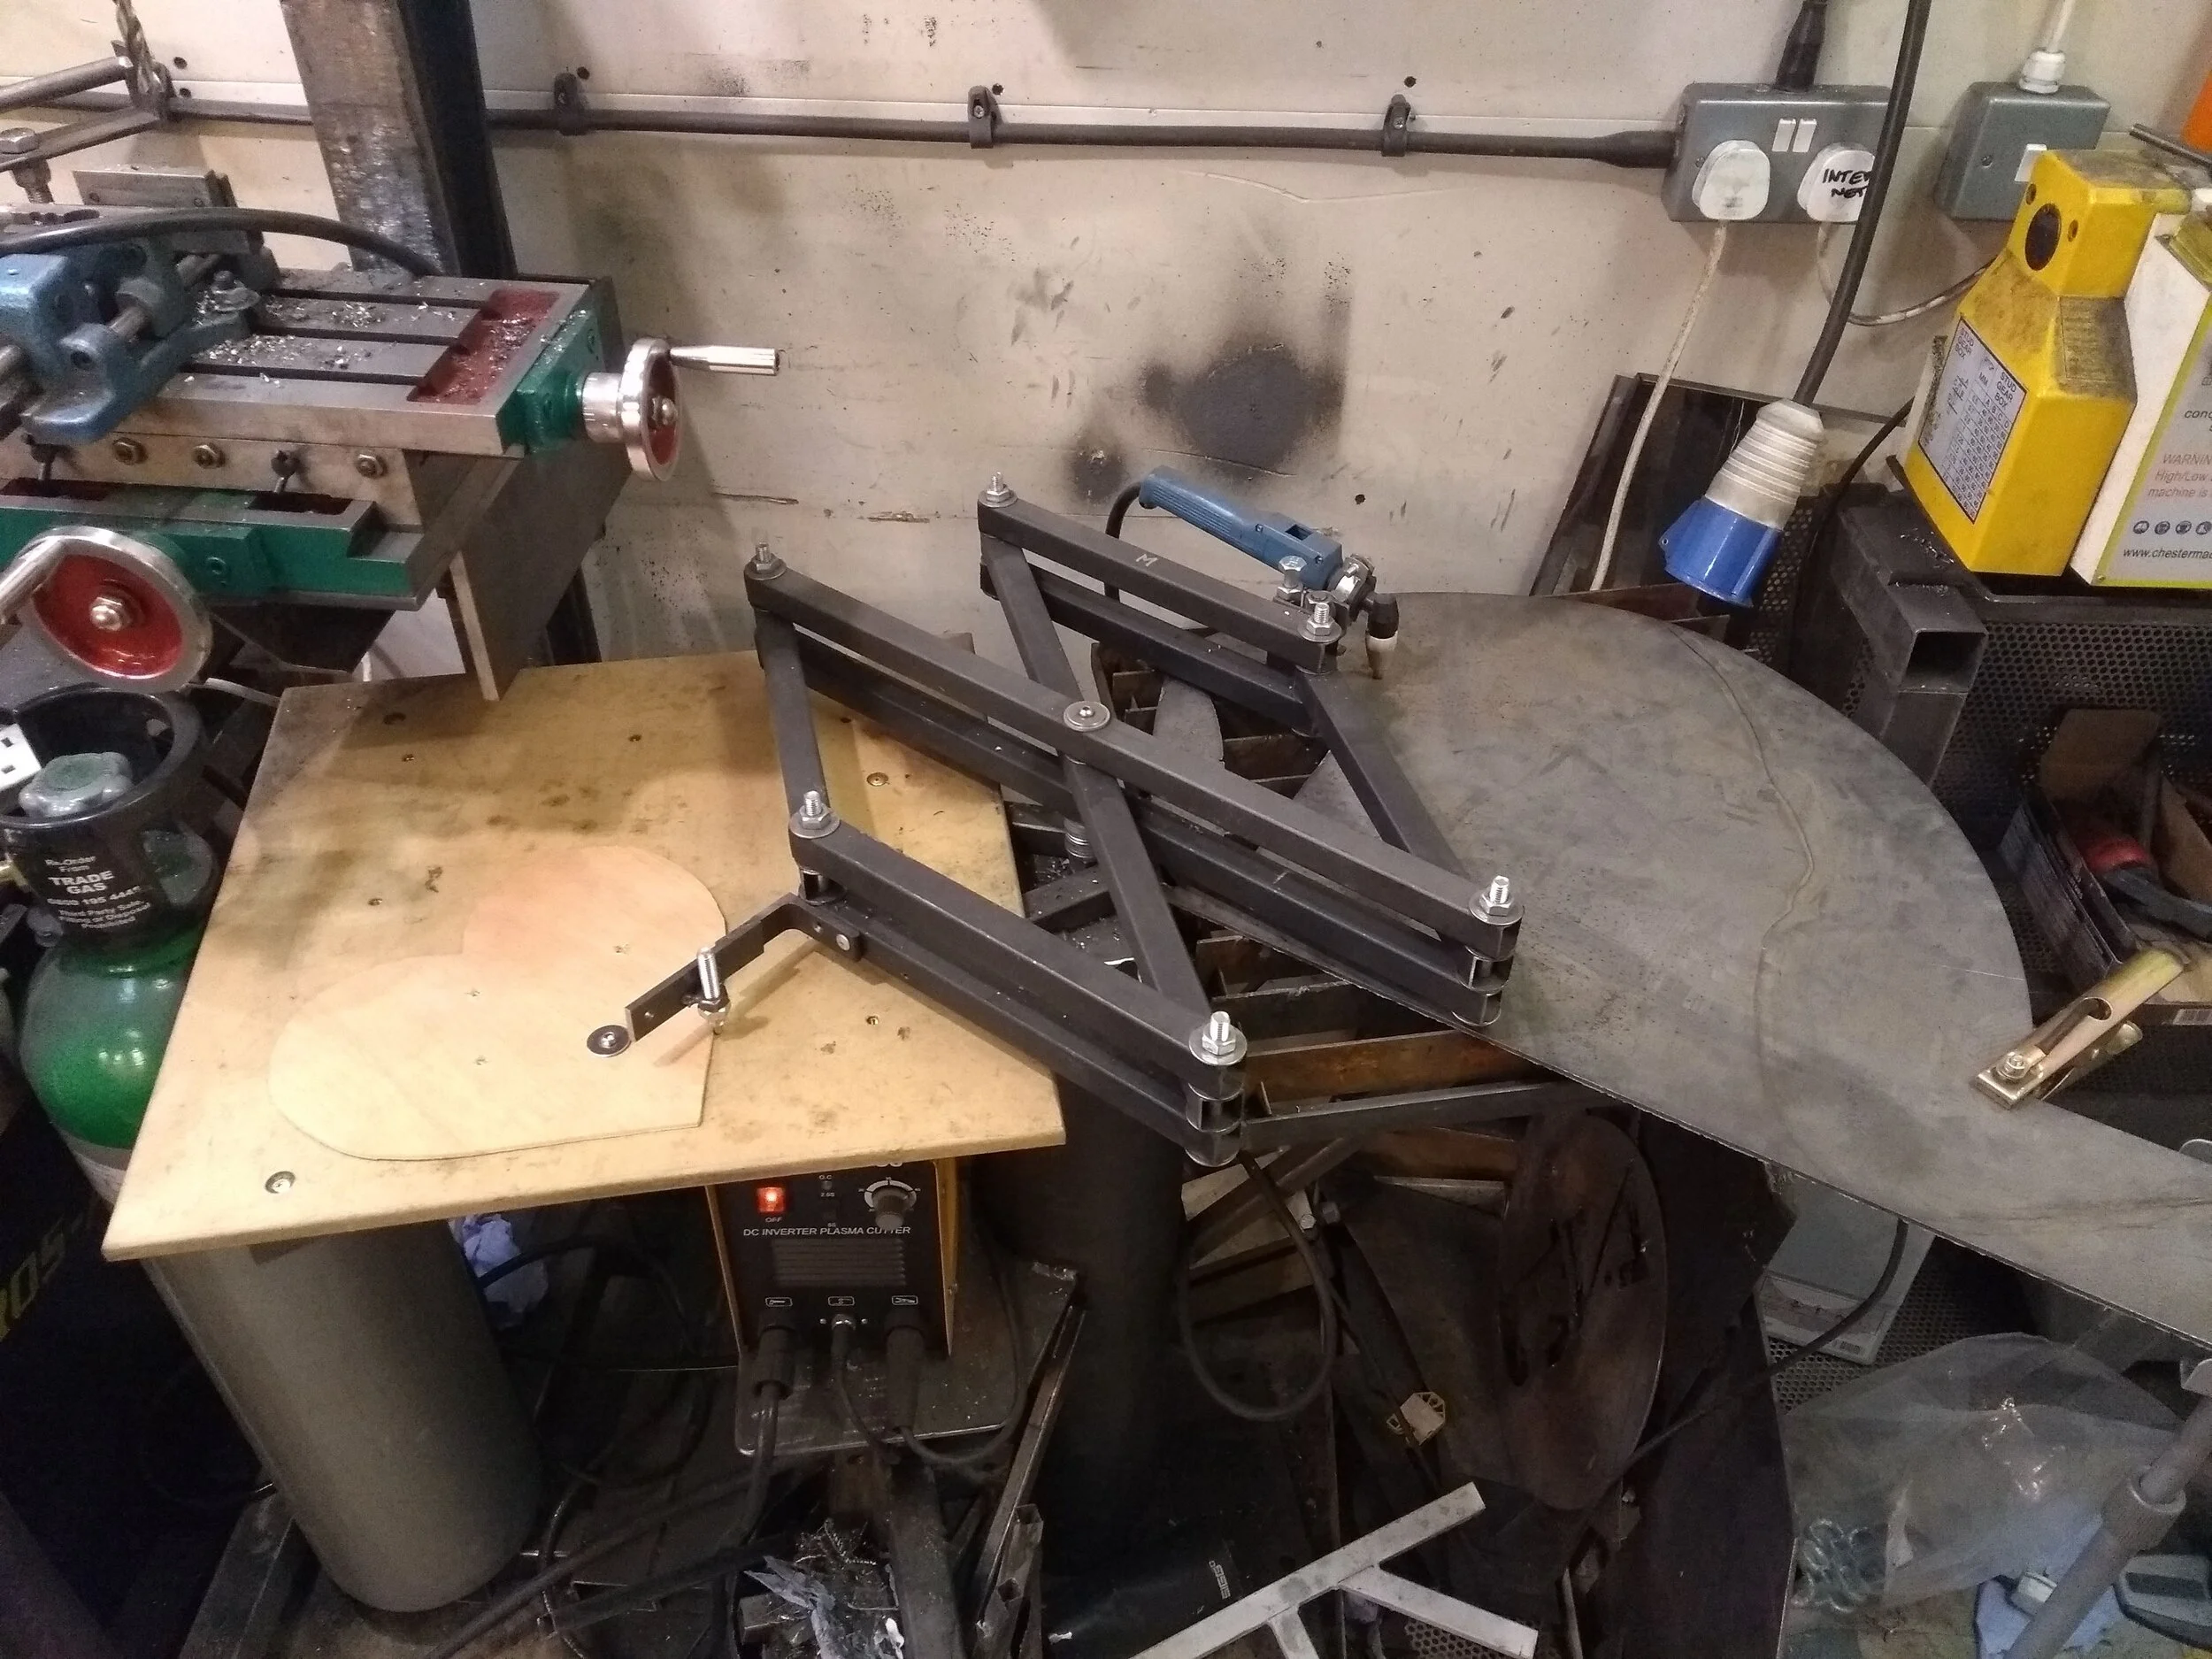
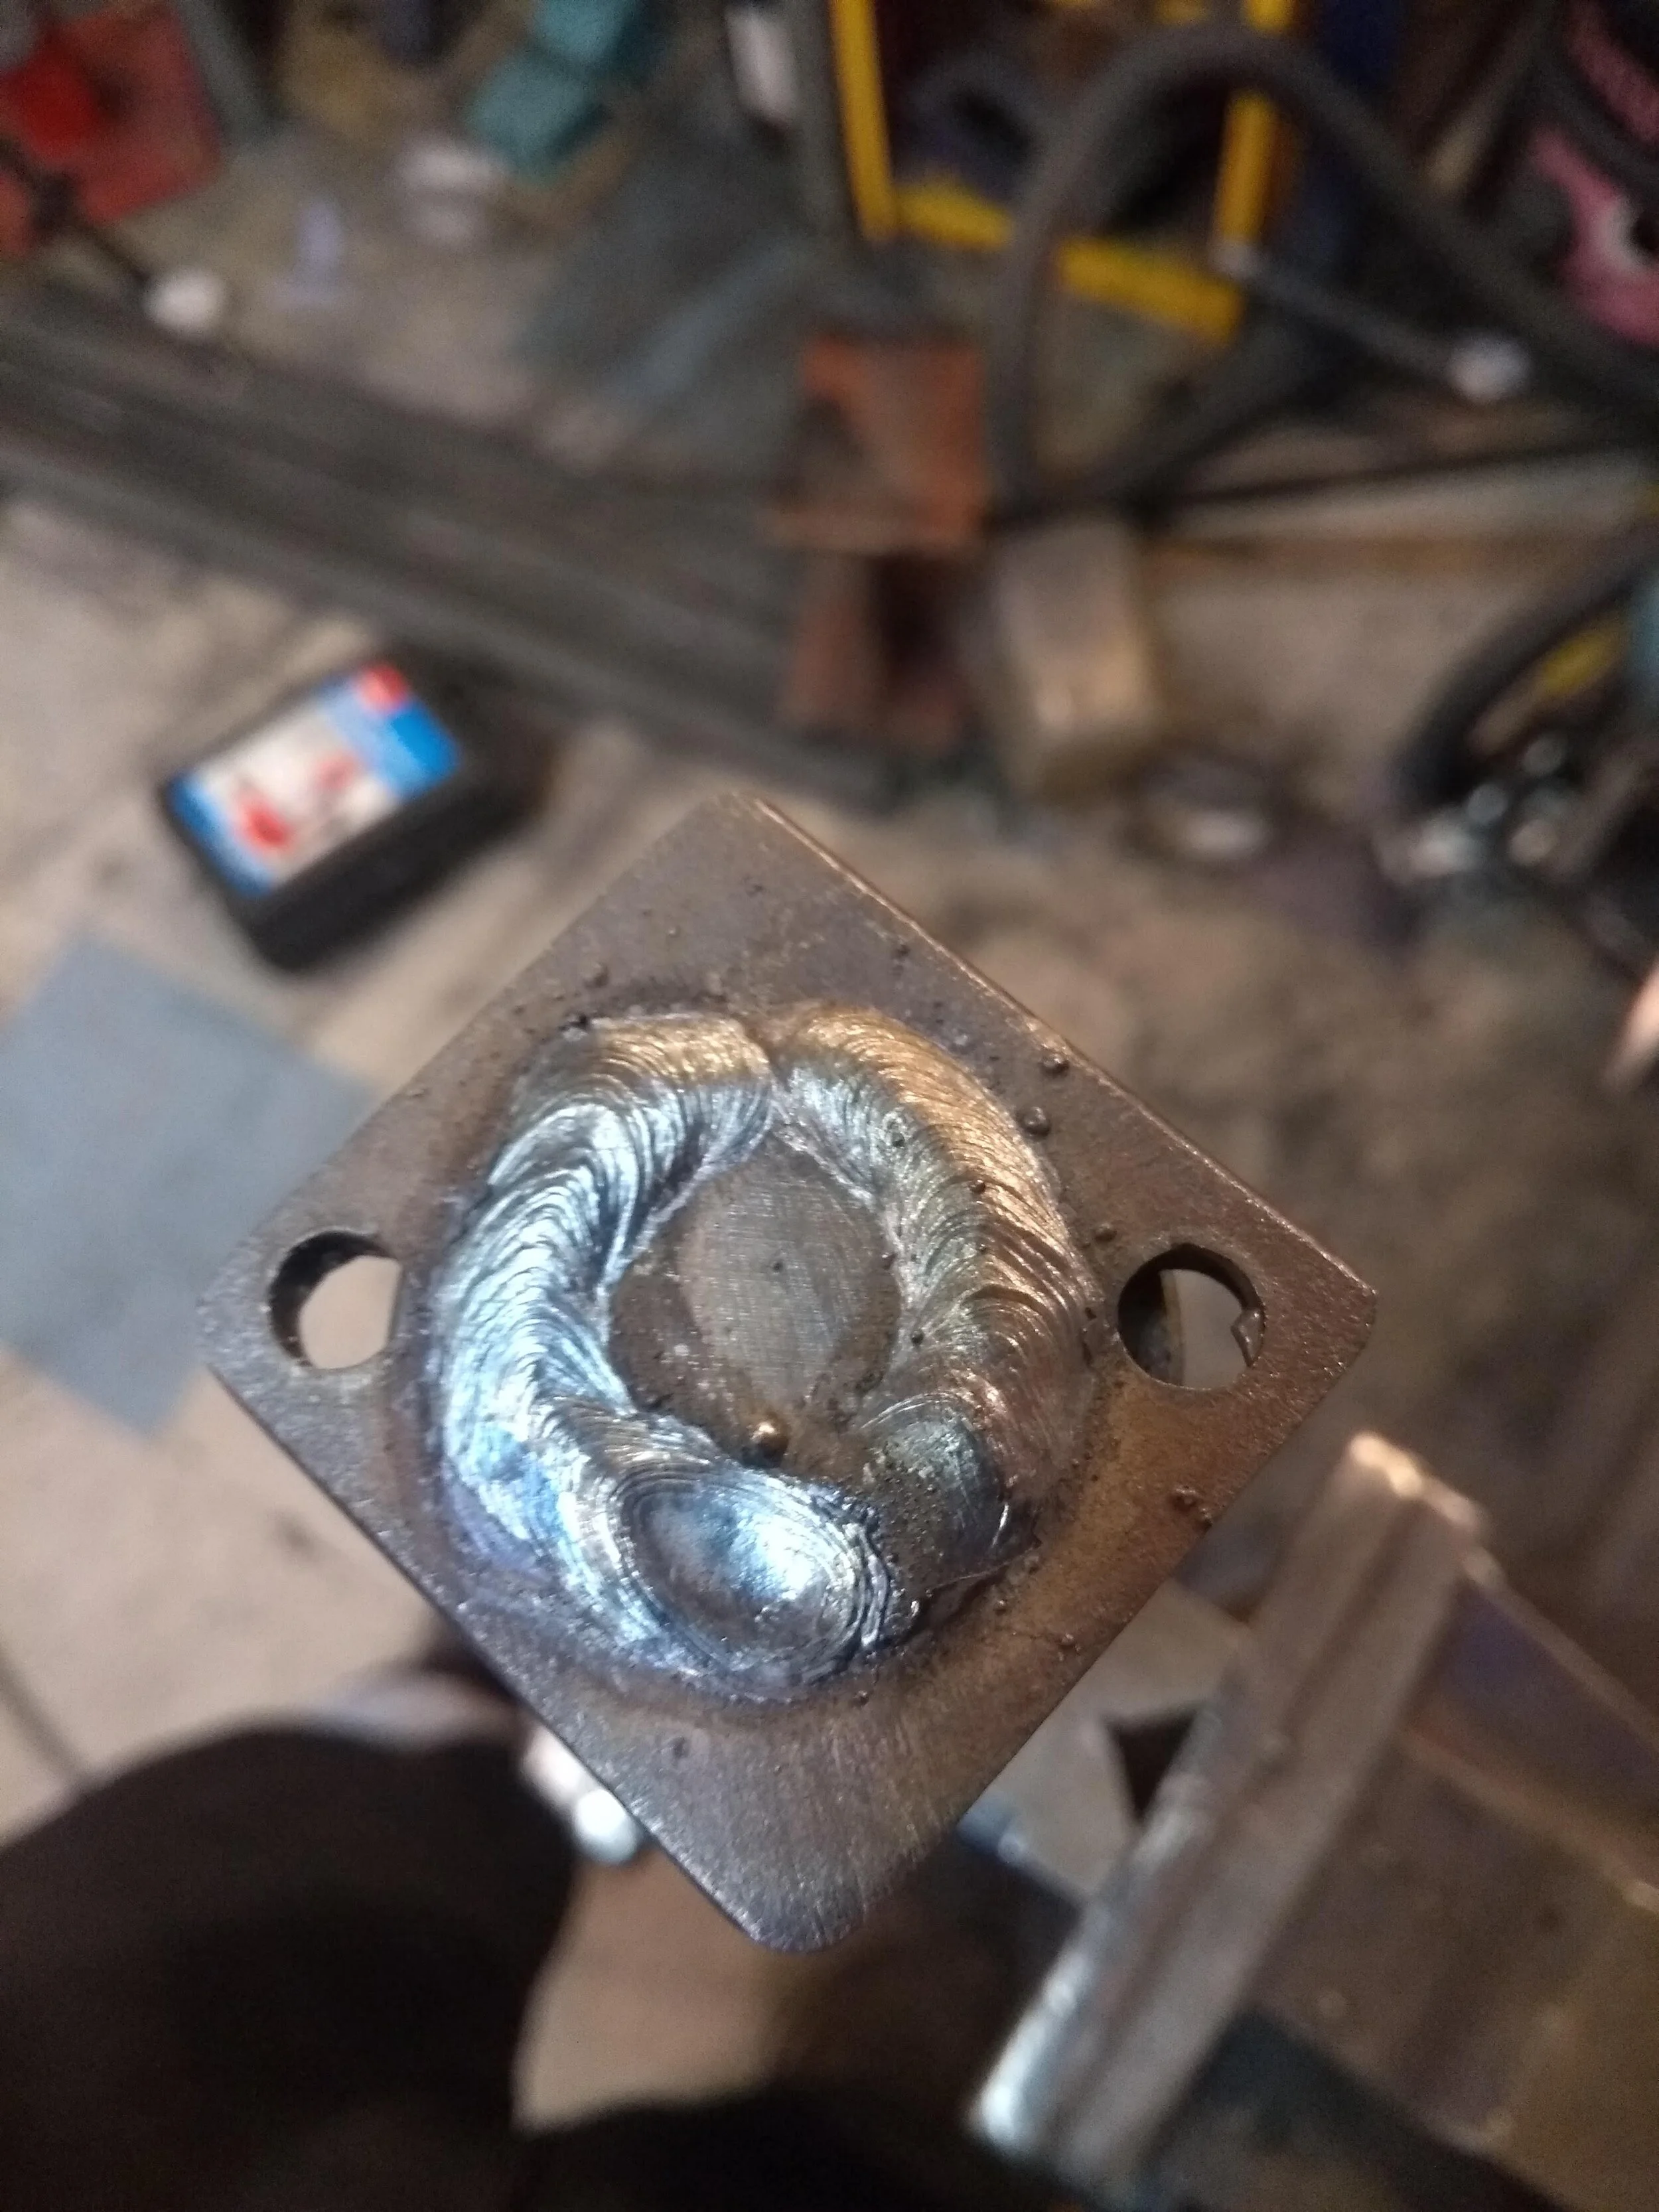
This process is described in detail in a series of tweets HERE, but I’ll explain roughly what I did- starting with a piece of 60x6mm steel angle, I drilled it for two mounting holes, and one hole for the hardpoint itself. I then welded in some gussets for extra support. These were probably unnecessary, but I like to overbuild on projects like this.

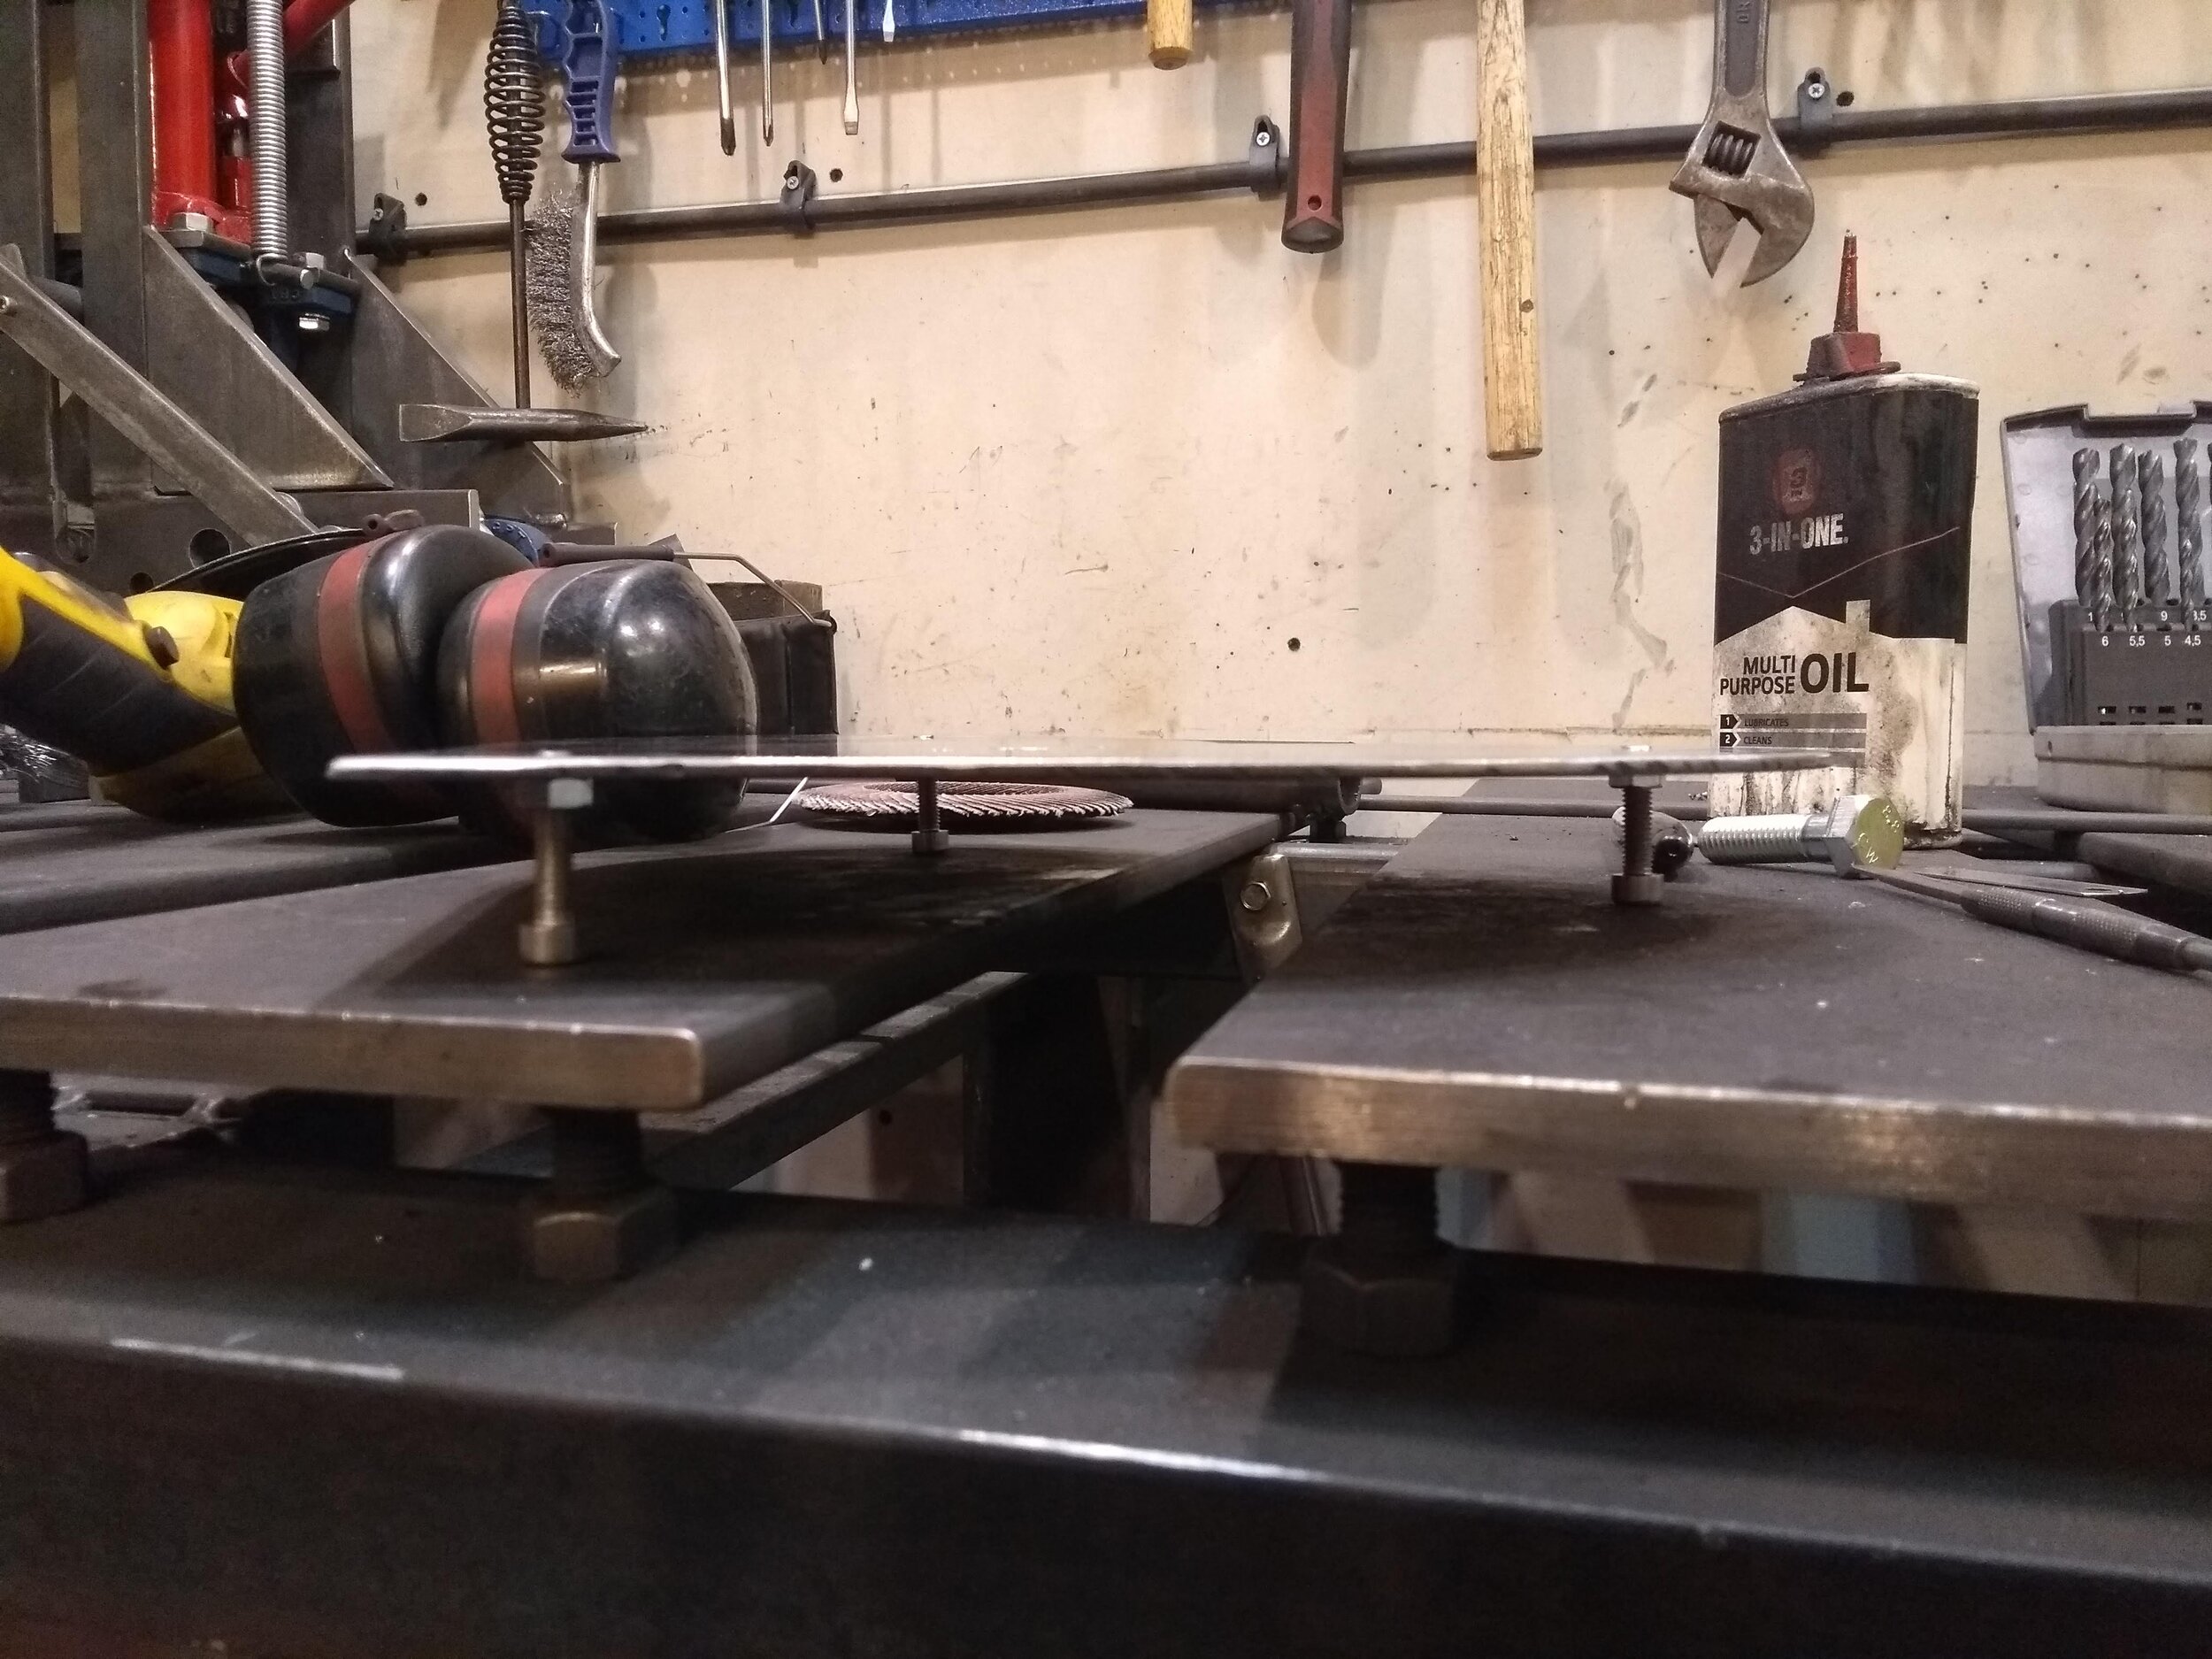
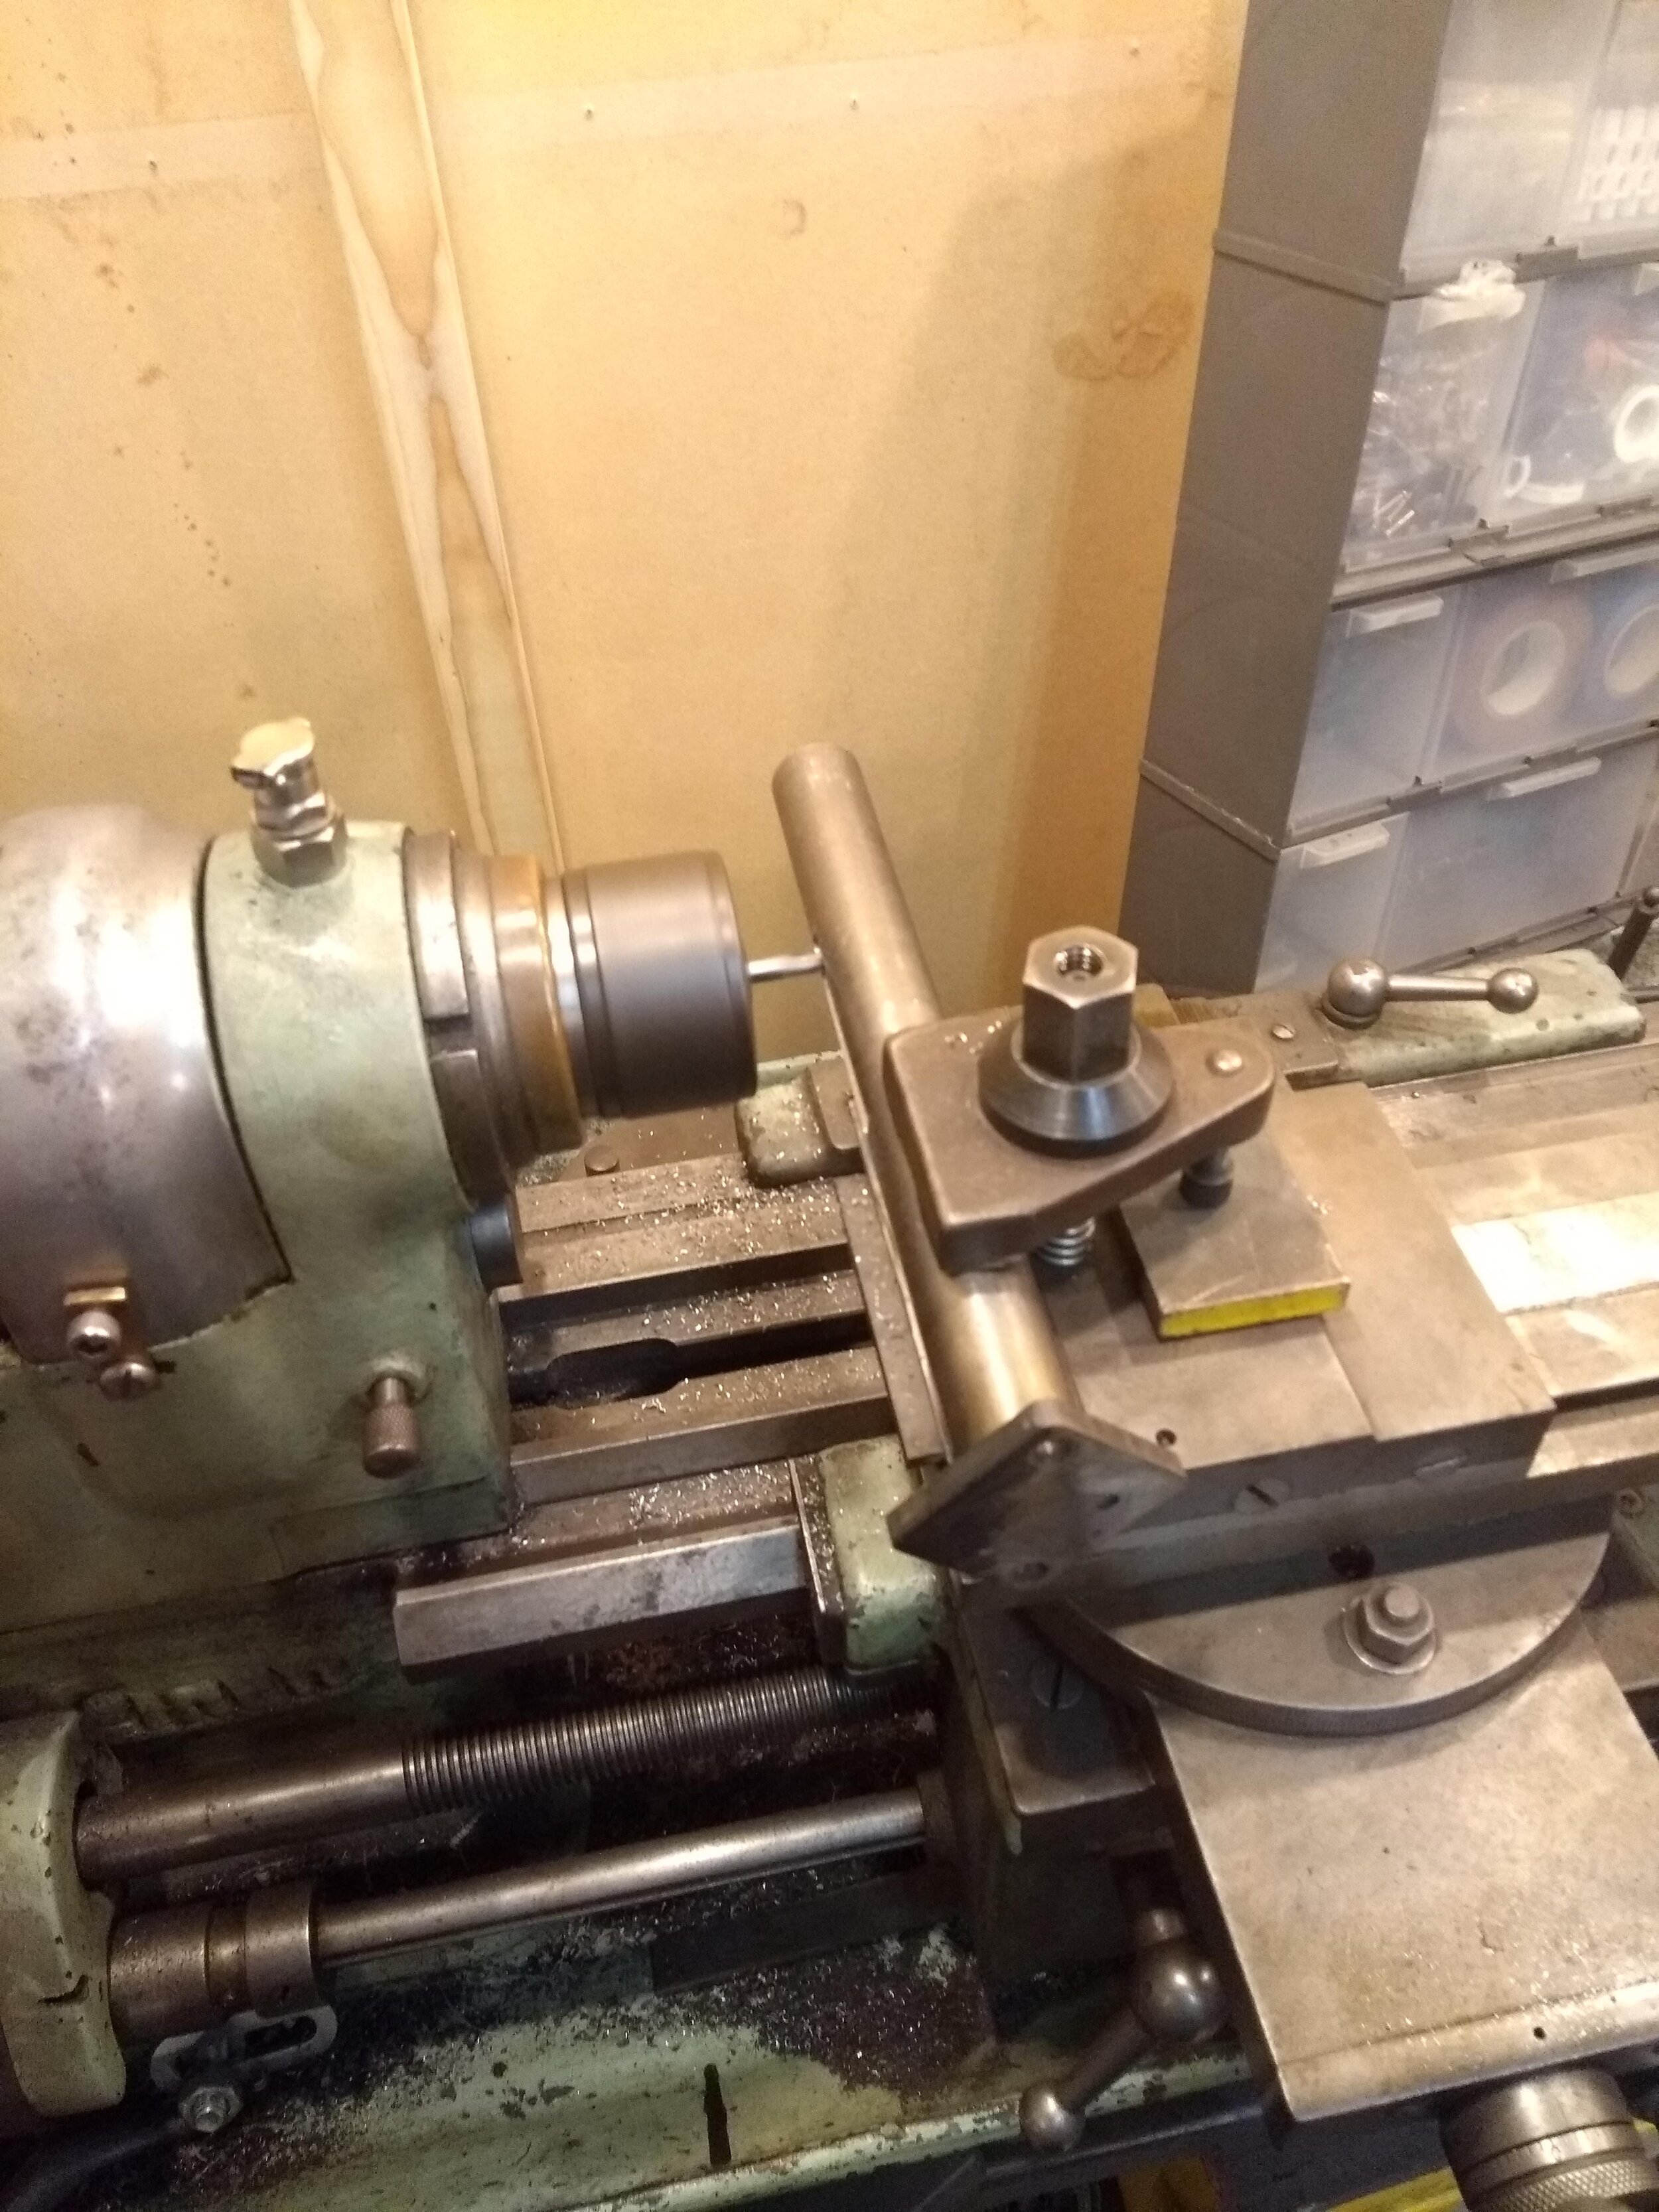
With the bracket made, I got to work on the assembly that will be the actual attachment point in the room below. This was a piece of M12 studding (threaded rod) with a ring nut on the end, held in place with threadlocker (a specific type of glue) and a lock nut. The threaded portion would then run up through the ceiling, through the bracket, through a thrust bearing that would allow it to spin, before being fastened with a nut. Since it was able to rotate, it was necessary to ensure that the nut holding it in place could not come undone. I did this with a locknut and a castle nut, which has grooves cut in it. A hole drilled through the stud itself allows a split pin to sit in one of these grooves, preventing the nut from turning. You can see a bit more detail HERE.

With all that done, the finished assembly looked like this.

A fabricated steel bracket with a long eye bolt in front of it and two standard hex bolts to the right

With the fabrication portion of the project complete, the next day I headed back to the client’s house. Installation was pretty straightforward.

First, I went back into the loft and took up the relevant floorboard. Then I removed the insulation (a very old loose kind) with a vacuum.

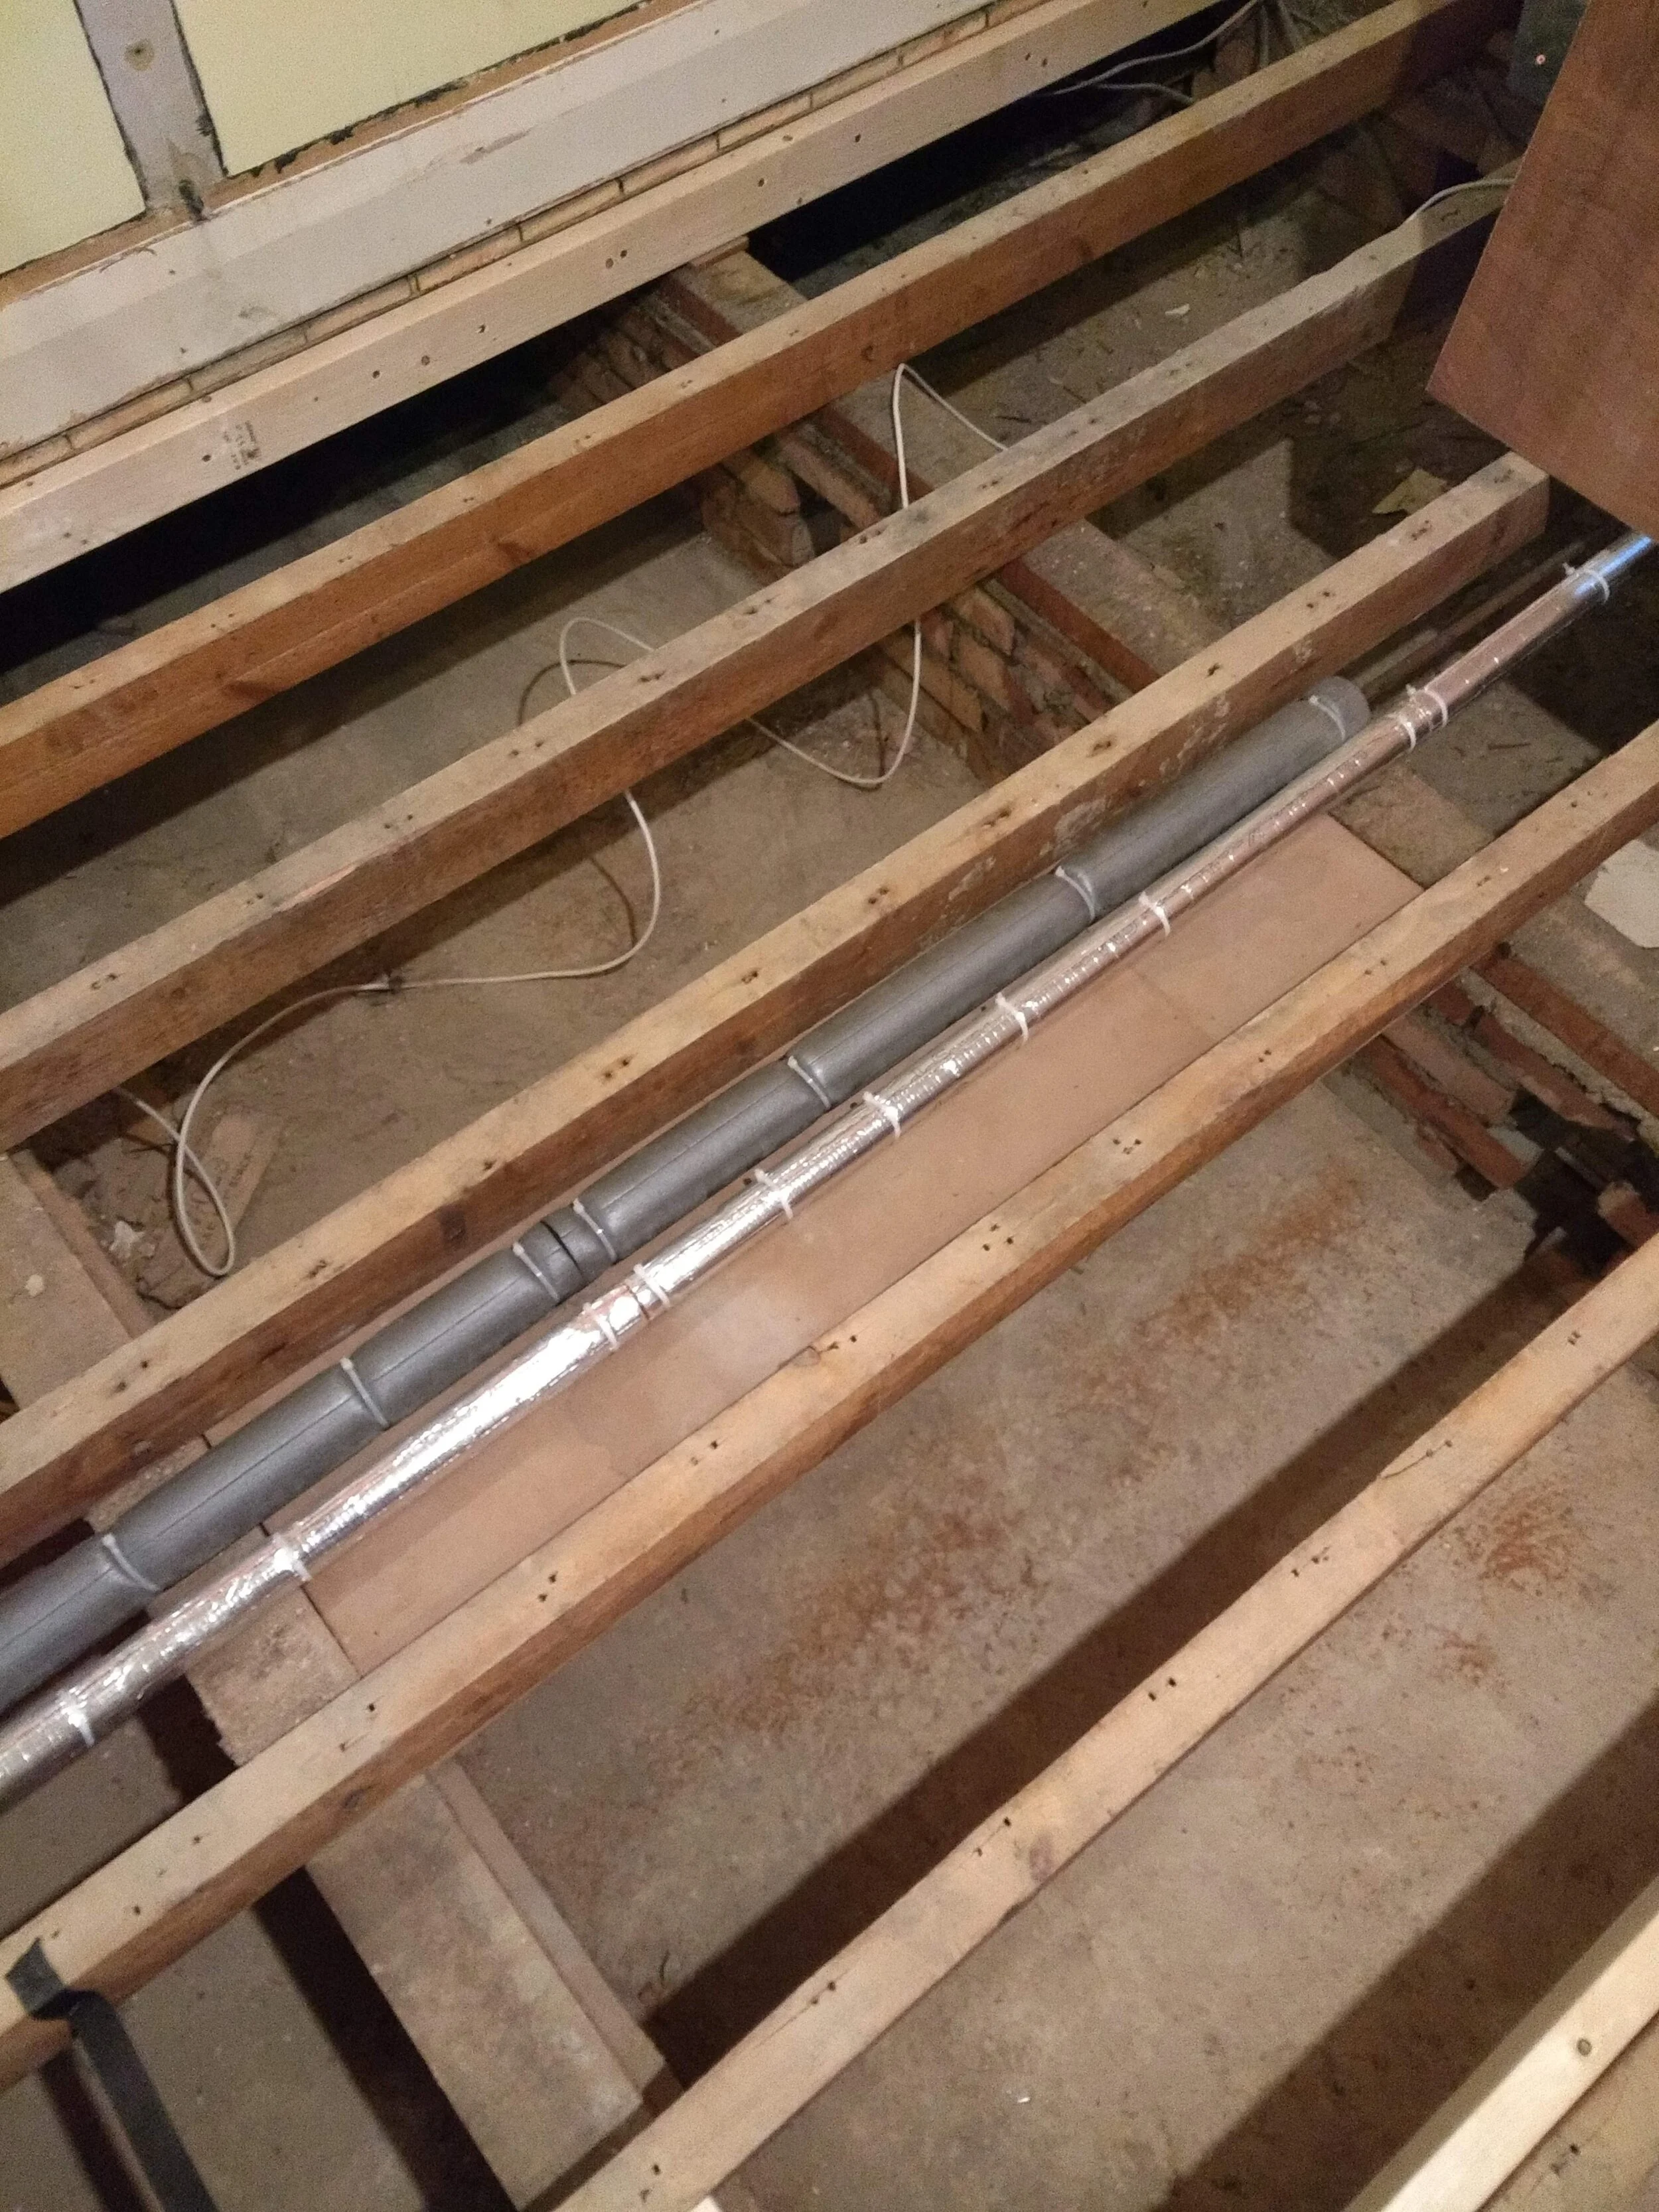
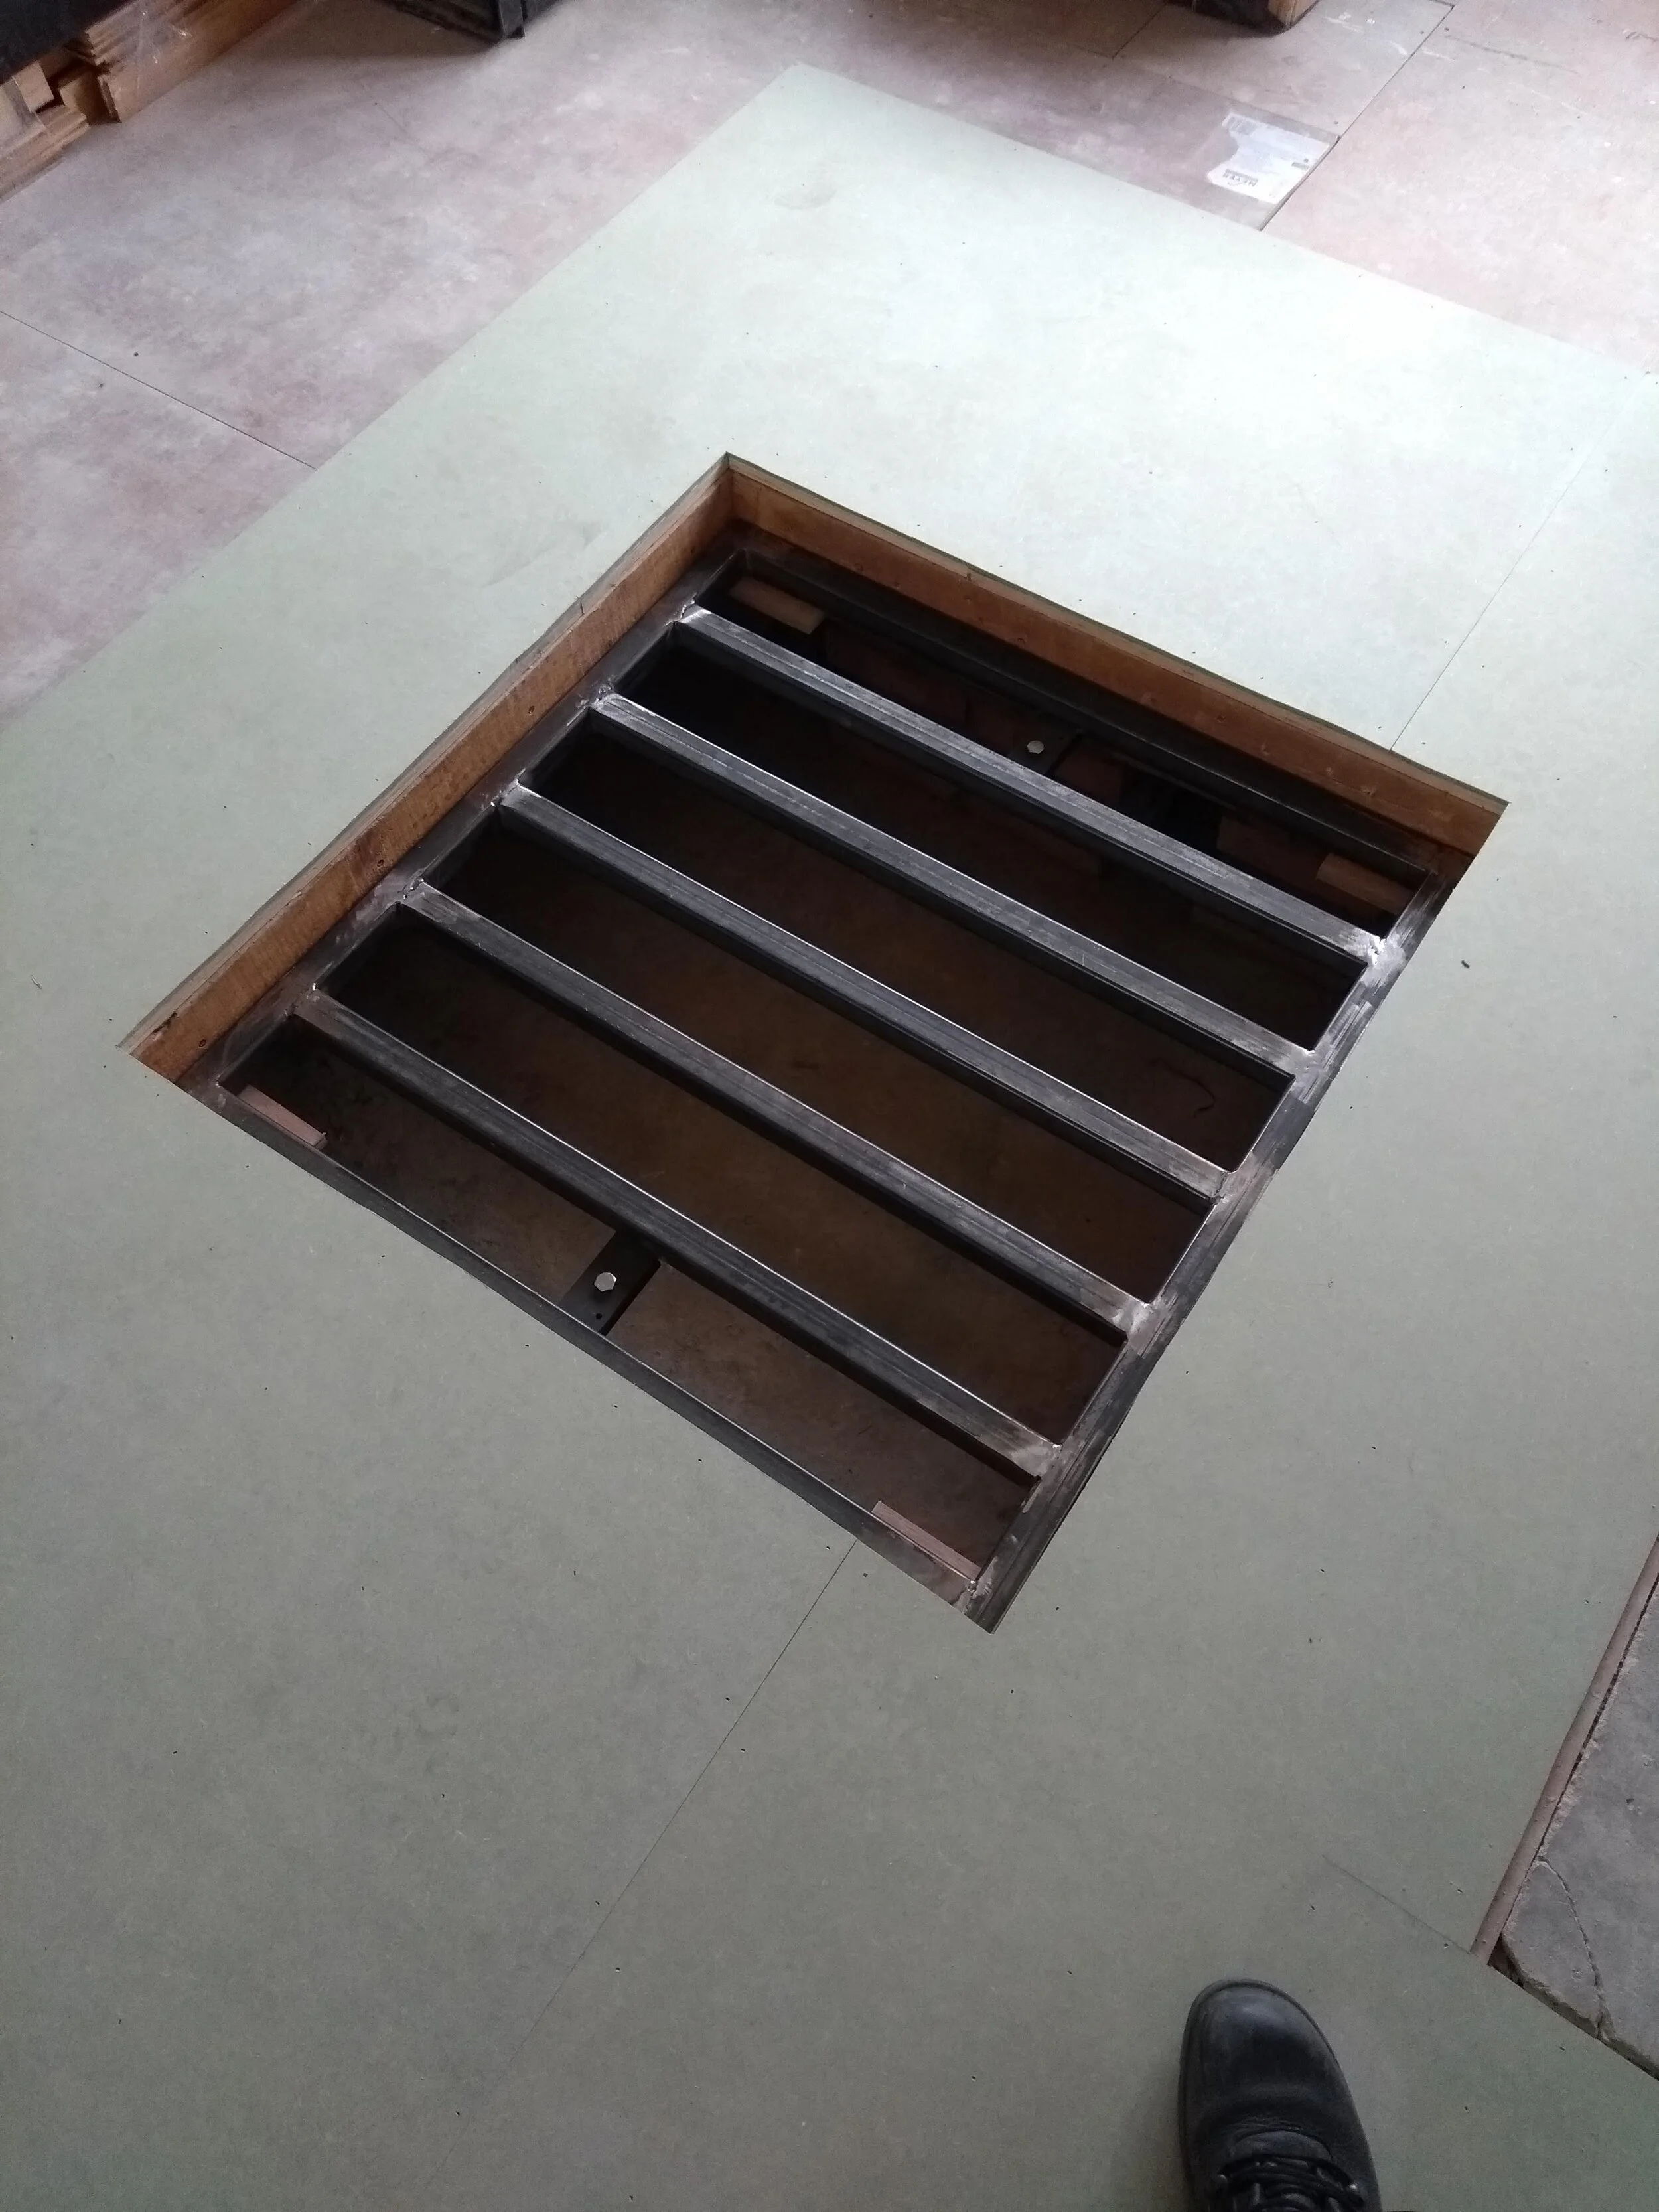
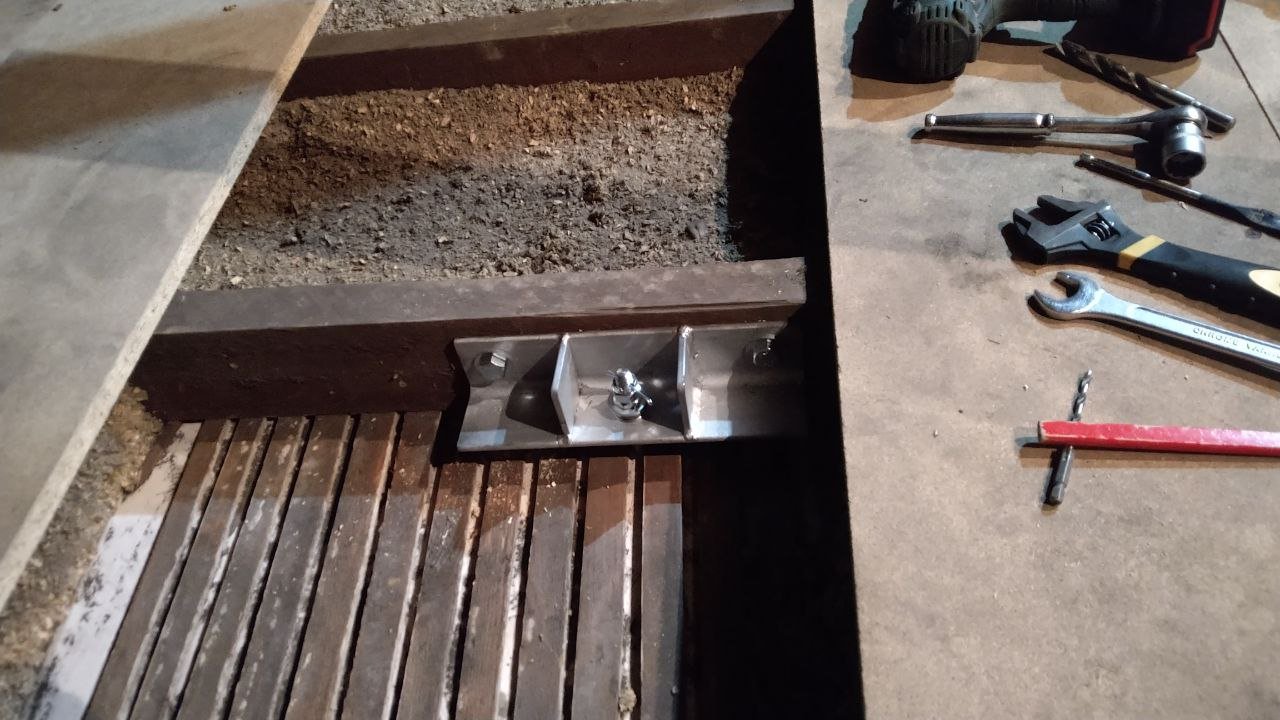
The large timbers running top to bottom in the image are the joists. The narrow strips of timber running side to side are laths, which were used to hold up plaster in the days before plasterboard. Having measure downstairs to find the location of the hardpoint, I put the bracket in the correct place and marked the hole for the stud. I then drilled it with a small drill to confirm the location. With the client happy that it was in the right place, I drilled the hole out to accept the stud, and with the clients help, temporarily fixed the stud in place.

I then put the bracket over the stud, which allowed me to locate the holes in the joist that it would bolt through. I drilled them out, bolted the bracket in place, and then adjusted the stud to final height and added the lock and castle nuts. There are also a pair of lock nuts between the ceiling and the bracket to stop the ring nut from being pushed up into the ceiling and damaging the plaster.

Here’s the bracket bolted in place:

Next I added some reinforcement between the joist with the bracket on and those on either side. As weight is added to the hardpoint, the joist might want to sag a little. It can’t really sag in a straight line, it’ll try to twist, and so adding some pieces of timber between it and the other joists prevents this. These are just nailed in place. For some reason, these pieces of timber are called noggins.

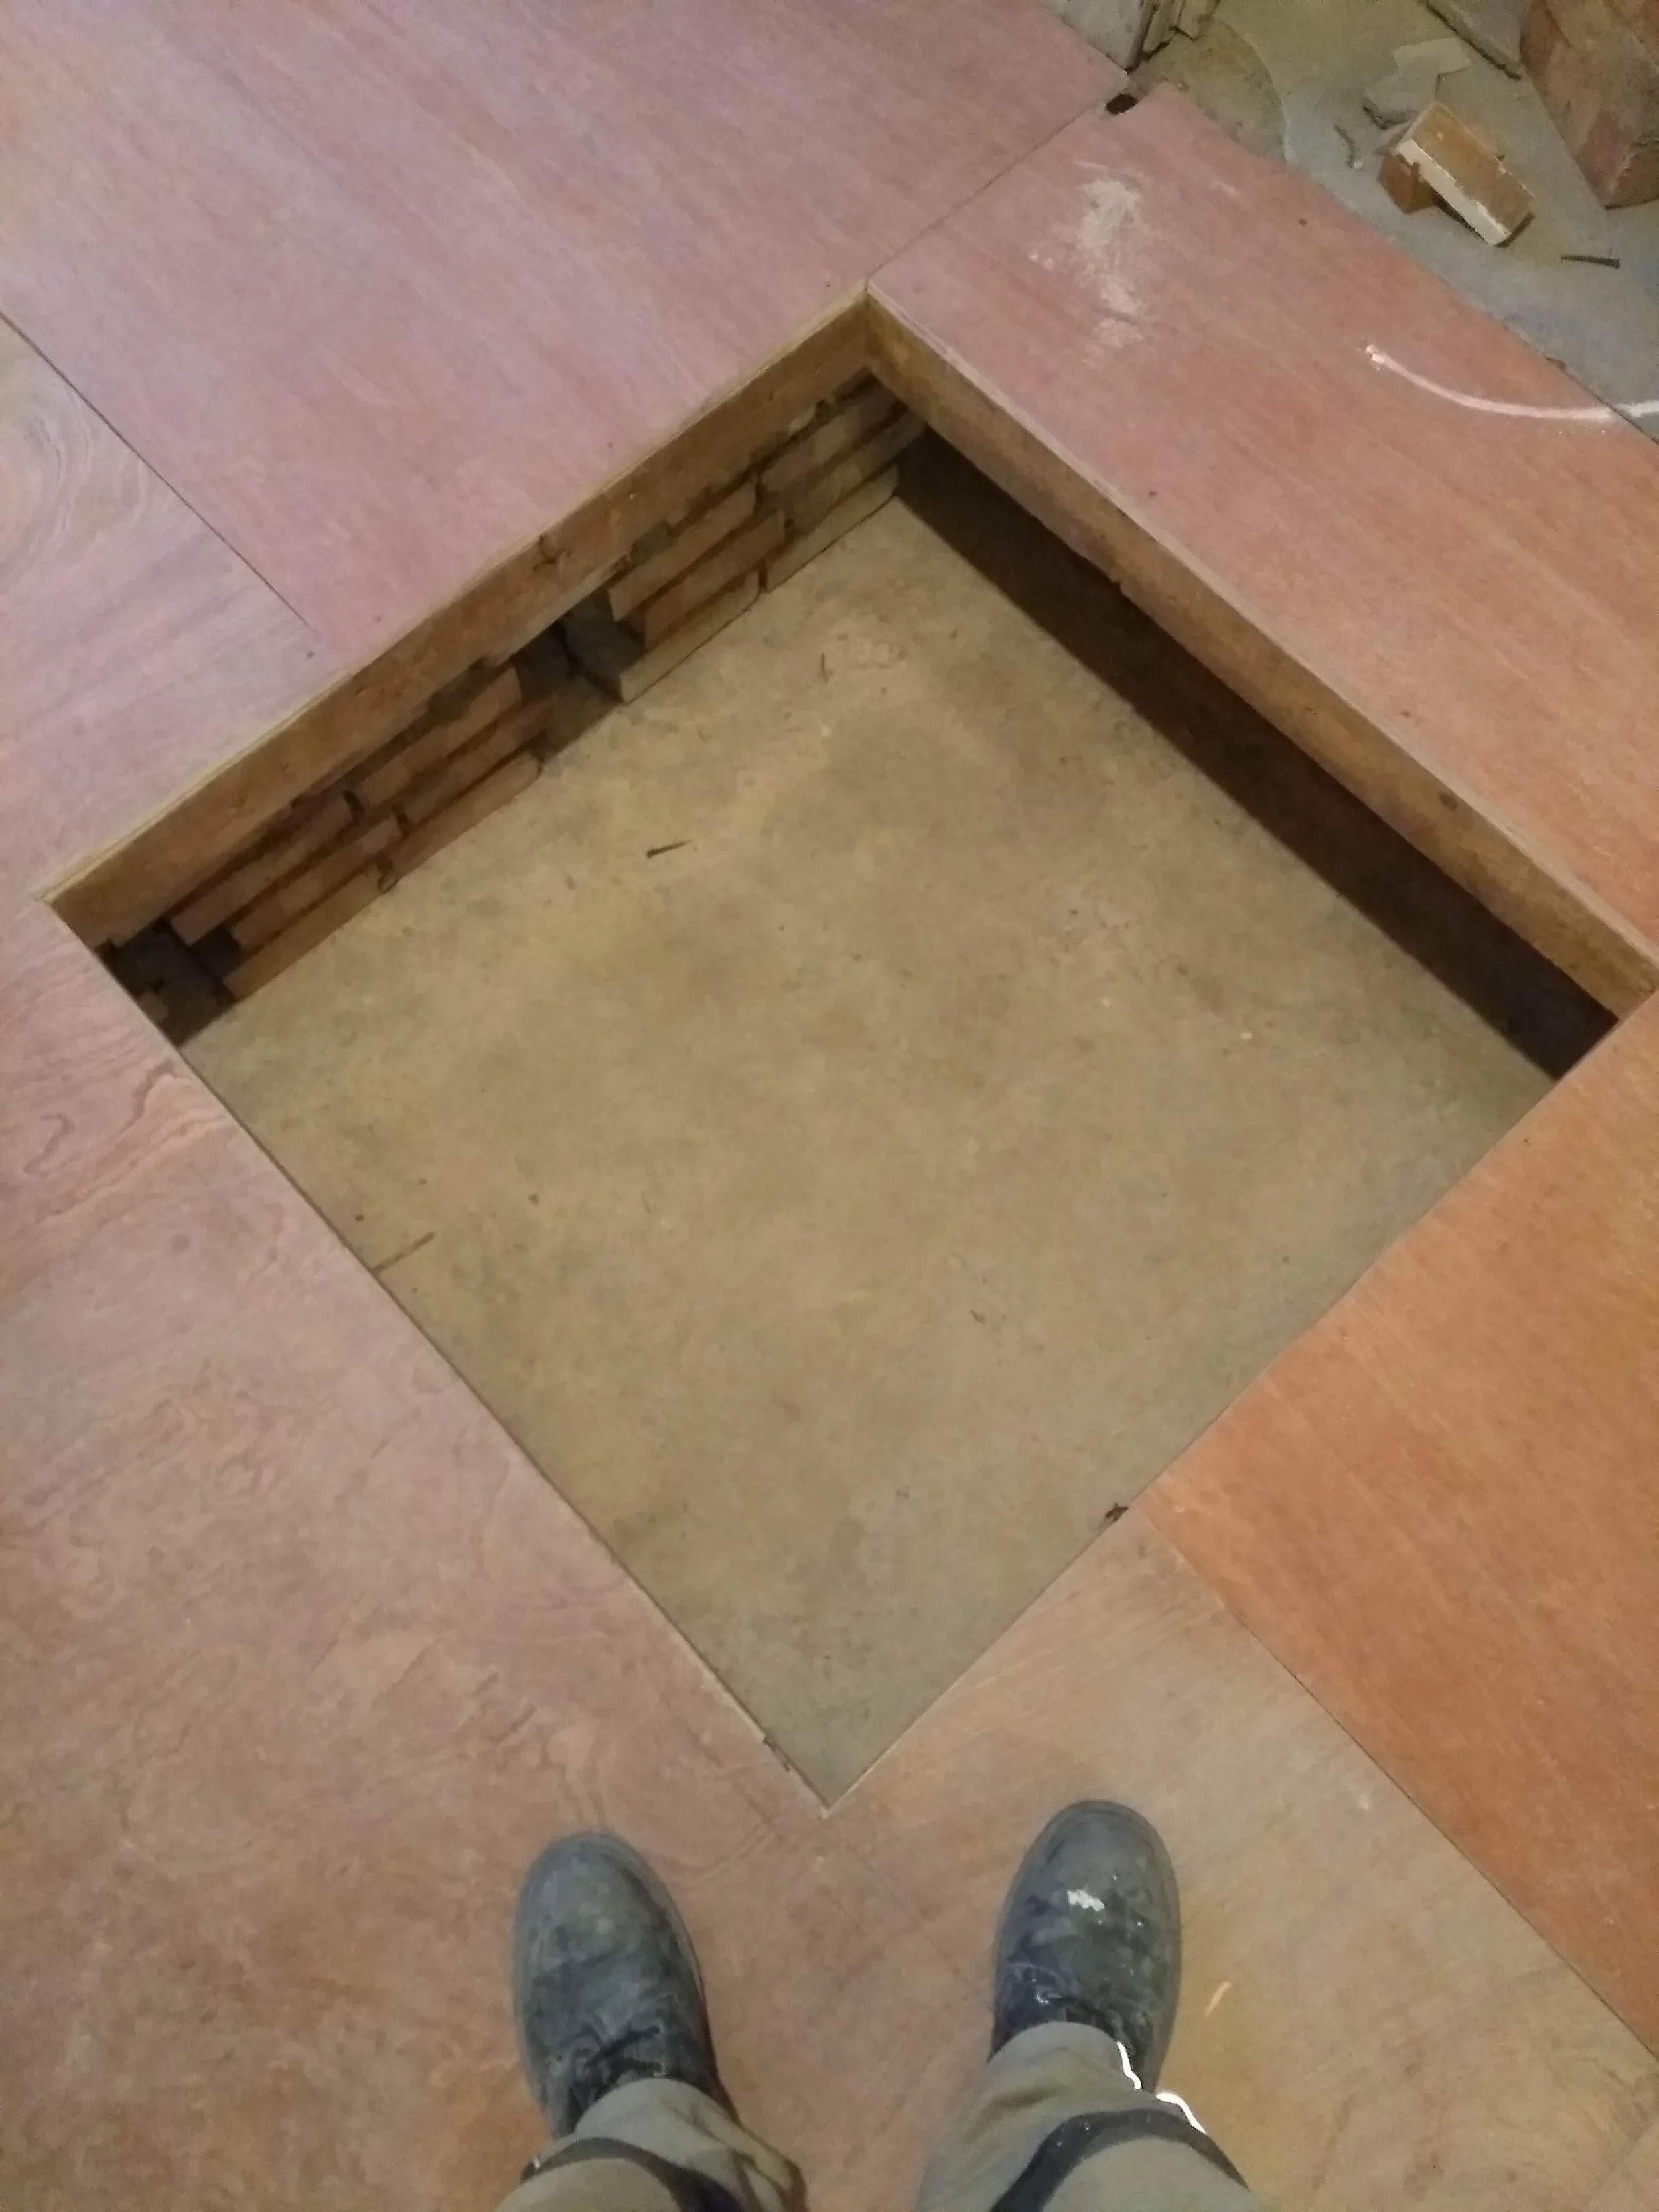
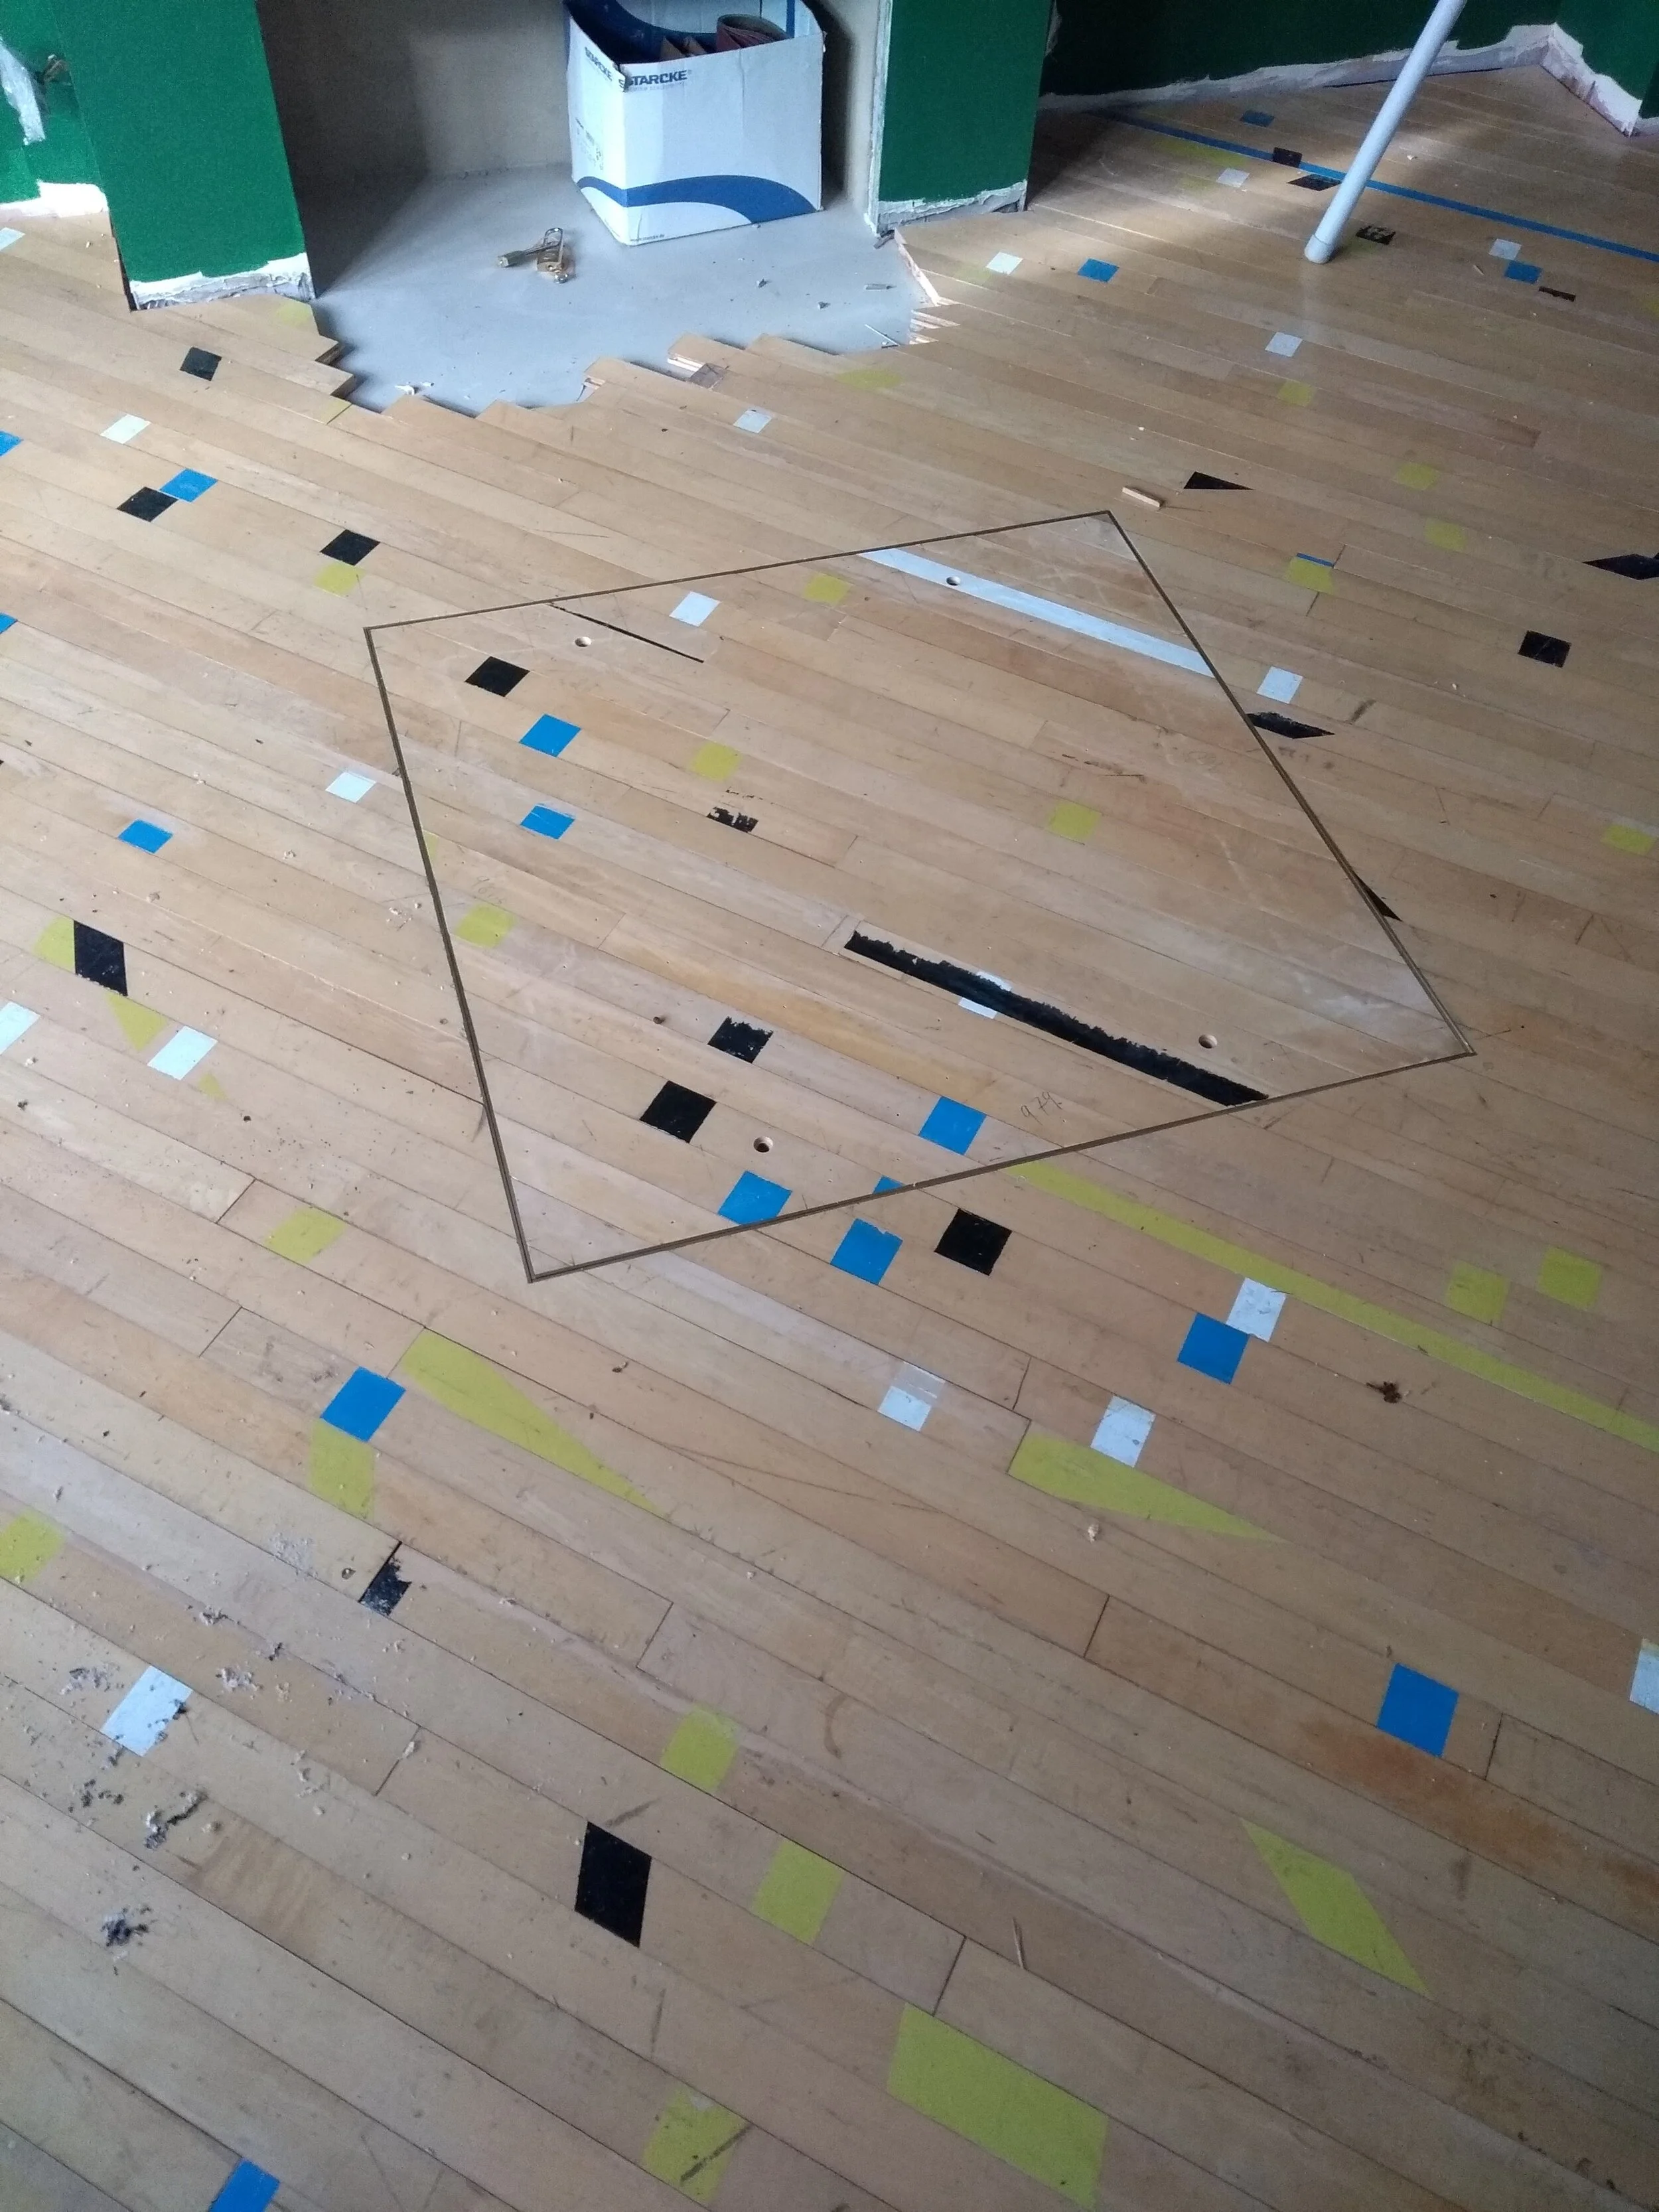
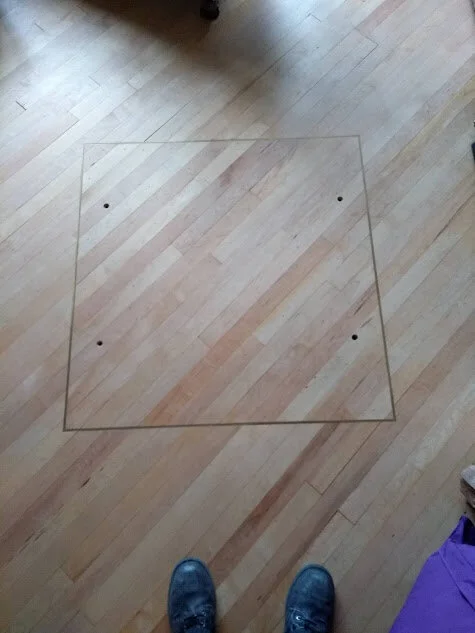
That’s all the structural parts done, but I needed to ensure there was easy access to the bracket, for inspection and maintenance, and also because the client wanted the option of removing the stud. I made a hatch by just cutting the floor board into sections and drilling a hole to pick the hatch up by.

With all that up in the loft, all that’s on show in the living room is the ring nut:

And that’s that!

If you want a hardpoint installing in London, get in touch! Here are some things to consider:

I’ll need access to the joists. This is usually easiest by going in from above. If that’s not possible, I’ll have to make an access hole in the ceiling, which will then need replastering.

If your house is more modern it may be necessary to reinforce the joists further.

This hardpoint was designed for single point suspension. If you wanted one for a swing or similar, with higher dynamic loads, it would be necessary to do further reinforcement.

This installation was pretty straightforward, and I quoted £150 for it in mid 2022. Naturally a different situation, particularly one of those listed above, may affect the price.

Hire Me!

If you need general handyperson things doing, get in touch. I charge £20ph, with a discount if it's a bigger or ongoing job. Things I can do include:

Carpentry- repairing things, hanging doors, stud walls, trim work, decking, flooring, that sort of thing.

Fabrication- If you need a custom bracket or similar, perhaps for curtain rails, mounting plant pots on the wall, hammocks and hanging chairs, hardpoints, or anything else, I can make that for you in my workshop and then bring it up and install it.

General things- hanging pictures, curtains, handrails... all sorts really.

Please get in touch and ask if you're not sure. I have a wide range of skills but I'm also very aware of my limits. Can cover most of London, and maybe further afield by arrangement. Email me at harley@harlequinworks.com

Here’s a picture of the building process for some decking I built for the Foxglove pub in Islington last year.


Tool Tour, with Prices

This is a post about the tools and machinery that I use in my metal workshop. A little information about each, and what I paid for them. In no particular order:

Big disc sander- £200

Big disc sander.jpg

This machine I bought new for £200. It’s a 12” disc, 1.5hp motor, and it’s a great addition to the shop. You see a lot of very similar designs at varying pricepoints- this one was at the more expensive end, because it’s entirely cast iron and has a rack and pinion table adjustment. Intended for woodwork, I put a 36 grit zirconium disc on it, and it eats steel up. Great for weld prep, truing up mitres, and rounding off corners.

Small disc sander- £30

Small disc sander.jpg

Like many of my tools, this one came from Lidl- Lidl do astonishingly good tools, often manufactured for them by established tool companies. In this case, I suspect the sander was made by Proxxon, who do a lot of quality small engineering tools. Oddly, aside from Proxxon’s own disc sander, there’s really nothing else of this size on the market that doesn’t also have a belt sander, which I didn’t want. I got this specifically for smoothing the edges of my identity tags, and it’s so so much quicker than the old days of clamping each one in the vice and rounding them off with an angle grinder.

Bench grinder- £20

Bench grinder.jpg

This is the most powerful motor in my shop, at 2hp. It’s extremely old and heavy and, I think because of that, I got it on ebay for £20. On one side I have a standard 8” coarse grinding disc, for sharpening lathe tools and larger drill bits, and on the other I have a wire wheel, which is great for cleaning up parts, deburring, derusting, depainting, and so on. I’ve thought about wiring it up properly with an emergency stop, but that would be of limited utility because it takes a full minute to stop spinning after it’s turned off. Probably the most dangerous machine in the shop.

Lidl drill press- £150

New drill press.jpg

This was a purchase of convenience. I drill a lot of small holes, all the same size, for all the identity tags I make. I have a much nicer and much older small drill press, but it needs a new motor, and that’s a whole thing because motors now have standardised metric mounting points that do not marry up with 70 year old drills. I needed something right now, and for what I got it for, it’s fine. However, I wouldn’t recommend it as your only drill press. The head doesn’t come down far enough, and it’s lacking in torque. The cast v-groove in the baseplate ought to make cross drilling round stock extremely easy, but I was not able to get the drill on centre with it. Fine for the production drilling of small holes that I do, but I wouldn’t get it as an all round drill press. One of the few Lidl tools I’ve not been super impressed with.

Roll bender- Around £100 worth of purchased parts, plus a bunch of scrap that would have been fairly expensive if bought new

Roll bender.jpg

This is the mark II rollbender, which I built myself. It’s modelled after the ridiculously masculine “swag hulk off road” or something, only that uses 6mm steel for its sidewalls, and I used 12 because it’s what I had; it uses 12mm axles and I used 25mm; however they both use a 2 tonne bottlejack to generate the bending force. I’ve not tested the maximum capacity of this yet, but the one it’s based on can bend 50x50x3mm square tube, so it ought to be able to manage that and more. (in addition to the slightly embarrassing name of the swag hulk off road, it also costs around £800, plus about £150 for each set of dies you want for it, so it was never an option).

Horizontal bandsaw- £136

Bandsaw.jpg

Another ebay purchase, my friend and I drove out to Colchester to collect it. We went to Colchester Zoo while we were there, which was a great time; we saw sealions. This is a standard 4x6 horizontal bandsaw, in that it’ll cut material of up to 4” high and 6” wide. It’s a really common design that you can buy from lots of different brands. Last time I checked they’re about £350 new.

I have had to make a number of modifications to this saw, and it’s a pain to cut mitres on because of how the vice works. Now, though, having switched to good quality vari-tooth blades, got the blade guides running correctly, and added a flood coolant system, it really is a beast. Rather than doing all that I might have upgraded to a better saw, but there’s nothing better quality that isn’t also much much bigger. I built a trolley for this one, and now it lives under the bench and comes out when I need it. It can also be used as a conventional vertical bandsaw, but I’ve not yet had need to set it up like that. I have a project coming up that might need it, though.

Small abrasive saw- £50

Cut off saw.jpg

Another Lidl purchase, I really like this saw. There’s no beating the bandsaw for heavy stock cutting, but when you have something small to cut to length quickly, or something that’s too hard for the bandsaw, this thing is great. It’s an 8” disc- 12” is standard in saws like this. I wouldn’t want to do anything accurate in it, but for coarse cutting it’s really great.

Oil cooled welder- £80

Oil cooled welder.jpg

I started welding with an old buzzbox style AC welder my cousin gave me. They’re a fine way to start welding, but their duty cycle- that’s the amount of time it can spend working before it overheats- is too low for serious work. That same cousin told me about oil cooled welders, which are catastrophically reliable, and archaic, so I found this one on ebay for £80 at a garage in Cambridgeshire. The same friend from the essex adventure and I drove out to collect it, and then spent the night with a friend in Cambridge. Another fine tool adventure!

It’s a Pickhill Bantam, made by Pickhill Engineering in Yorkshire, a family run company that still exists, making transformers and such. It doesn’t have fine control, but it goes up to 180amps, and will run 3.25mm electrodes all day without getting more than pleasantly warm. It’s also not filled with carcinogenic oil, which is something you have to watch out for in some of these old welders. It will outlive us all.

Mig welder- £800ish

MIG welder.jpg

This is the Cros-Arc 291c, a 250a MIG/SMAW welder. I bought it new from my local welding supplier, Ian at Associated Welding Supplies in Croydon. I needed a welding process that was better for thinner materials, and I’d initially planned to get a TIG machine when I had the time to learn TIG. A year after I decided on that, I was no closer to having the time to learn TIG so I bought this instead. I’d sneered a bit at MIG in the past because it’s quite easy to do, but that’s a ridiculous attitude quite honestly. I love this machine- it’s duty cycle is 60% at 250a, but I don’t go anywhere near that kind of current, so it’s basically 100% for everything I do with it. It’s an inverter machine, rather than the traditional transformer kind. MIG is a lot of outlay- the machines have a lot more going on with them mechanically that can go wrong, so you want a good quality one, and then you need to buy gas, which for a half height bottle like I use (of 5% CO2 Argon) is around £200, though £80 is returnable on the bottle- but when you’ve got that taken care of, it’s very cheap to run, and it’s a great welding process for the kind of thing I do. Also, for all that it’s easy to stick two bits of metal together, it takes a bit of skill to do that in a way that looks nice, and since I’ve started MIG welding my stick welding has improved as a result.

Rotabeast (big homemade drill press)- £110 head, £100 table, plus a bunch o’ scrap

Rotabeast.jpg

This is one of my favourite machines. It’s a mag drill head, which I got on ebay for about £110 because it wasn’t working properly- new, that mag drill (RotaBest RB50x) would have been around £900. In this case, it was the magnet that was the problem, so I took it out of the equation and just mounted the head straight onto a pedestal that I built for it, from a piece of old I-beam that came out of my friend’s house (and was replaced with a much better i-beam, don’t worry). It’s a 1.5hp motor with two speeds, gear driven, noisy as hell, and will put a 12mm hole through 10mm of mild steel in 8 seconds with no pilot hole. It has an MT2 spindle taper, which means I can fit it with a drill chuck, or annular cutter holder, or any other thing I might fancy. Using an annular cutter, its maximum capacity is a 50mm hole through 50mm steel plate, again with no pilot hole or other preparation.

It’s had a couple of different iterations- most recently, I reinforced the column to stop it twisting, and added a compound table which I got on ebay for £100. Ideally it needs a flood coolant system, but that can wait until I have a job that needs a lot of annular cutting.

Plasma cutter- £200

Plasma cutter.jpg

This is a generic 50amp plasma cutter from China. It works just fine, but I had to figure out a lot of it for myself, as the manual was completely useless. Now, I have it set up on this pantograph table I built, and it’s tremendously useful. I can make a template on the bandsaw in the woodshop, and 10 minutes later have it cut out of steel plate. (a note, if you want to get a plasma cutter, you’ll also need a compressor to run it, though I understand self contained units do exist).

Lathe- £450

Lathe.jpg

A Leinen D23LZ. German made in 1938, I bought this lathe on ebay for around £450. The same friend whose house I got the i-beam from drove out with me to Deep North Norfolk to collect it. The previous owner had had it about 15 years and not used it much, and he’d got it from a local engineer who’d had it for 50 years. It’s a real beast; the mini lathe I had before was alright, but once you’ve used a properly heavy, rigid machine, you won’t want to go back. The nice thing about it being German is that it’s all metric, which makes life a great deal easier. I intend to get it set up with a vertical milling table, though at the moment it’s possible to do extremely cursory milling by clamping a part in the toolpost.

Previously, I had a modern Mini Lathe, which was a good start, but not really big or rigid enough for what I needed. This was a huge upgrade that actually cost less than a new mini lathe.

Bench Shear- £150

Bench shear.jpg

I saw an advert for this and bought it. It’s about the only time an advert has worked on me like that. It’s from Axminster Tools, and made by Ehoma, which is a Taiwanese company. It’s really well made, much better than the generic ones that you can get for a little less money. I got it mainly for making identity tags- it’s so much quicker than cutting up little bits of steel like that on the bandsaw. It’s bolts into this bench that I made and bolted to the floor, specially for it and my arbour press since they require so much leverage.

Arbour press- £46

Arbour press.jpg

Another ebay purchase, this is a generic 2tonne arbour press, which I use mainly for stamping the letters into my tags. It’s also useful now for making small rings, and other stuff that needs a little judicious application of pressure.

Compressor- £100

Compressor.jpg

(Ignore the surrounding tools- this is an old picture because I forgot to take one of the compressor when I did the others) Lidl again! There’s not much to say about this, but it works well and was a good price. Plus everything from Lidl has a 3 year warranty. I also got a retractable air hose reel from there, which lets me get compressed air to anywhere in the shop.

Angle grinders- various, £20-35

Angle grinders.jpg

I have four angle grinders, to save time in changing over accessories. The best ones are the Erbauer (which I think is a Screwfix house brand) and the Lidl one. The Hitachi one is fine, and the yellow machine mart one is pretty rough. Having them set up and ready to go like this is super helpful, so I built them this rack.

Edited because I forgot:

Manual metal bender- £150

Manual bender.jpg

This is a great tool. It lets me bend steel bars of up to 50x8mm, and that very often saves time over cutting and welding them to shape. It’s bolted to the floor, and there isn’t really a way of using it if you don’t have that option. It’s great, though- the fancy Harlequin Works sign is made of letters bent up on this.

And that’s most of my tools and machinery! There’s plenty more hand tools and such that I use, but this is the obvious stuff. if you have any questions, leave a comment or, if you’re on twitter, ask me there. I hope you enjoyed this pictorial tour!

Building a Cage Under a Living Room Floor

Sometimes, someone needs some building work done that they don’t really want to have to tell a builder about. An example of this was a friend who noticed he had an awful lot of extra space under his living room floor, so, naturally, wanted me to put a cage down there.

Here’s how I did it:

1.jpg

These are the original floor joists. The first step, after lifting the old floor, was to mark the cut line on them.

2.jpg

The joists were cut, and the cut ends faced with some of the original timber, which defines the location of the trapdoor.

These pipes were boxed in to stop anyone pulling on them from within the cage.

The joists were then reinforced and noggins added between them for extra strength.

The subfloor (18mm ply) was then laid.

A trip to the workshop was then needed to fabricate the grate. It needed to be strong enough to support the floor when the trapdoor was on top of it, while also looking the part when the trapdoor was removed.

7.jpg

Now the final floor is going in around the hole. This was maple reclaimed from a basketball court in a school that was being demolished.

9.jpg

The edges of the hole were then neatly finished, and steel supports added to support the cage door.

A brass strip was then added to protect the edge of the timber. The cage was also painted.

11.jpg

The cage door, now painted, in place, and the brass strip on the edge.

12.jpg

A hatch was made to sit neatly in the hole.

Here holes are being added to allow screw-in handles to be used to lift the hatch.

Here it is in place…

finished.jpg

…and here it is after the floor was sanded and oiled.

HarlequinWorks November Update

I’ve started sending out a monthly Mailing List Mail. If you’d like to join the mailing list, you can do so here. Doing so gets you access to all the updates, plus any special offers or discount codes as soon as they go live, rather than waiting for me to get around to posting them here. A week or so after the mailing list mail goes out, I’ll post a blogpost version of it here.

Make sure you read right to the end for a special offer!

Hello!

How are you? Well? In the future these emails will focus on what I’ve been up to in the past month, but since this is the first, I guess it’ll need to encompass All Time up to this point. Make yourself comfortable; this shouldn’t take long.


What’s the deal?

Now, my understanding is that, prior to 1987, various things took place. HOWEVER, I was not there, and so cannot confirm this. My story begins one fateful day in 1987, and then jumps forward 18 years because this is kink stuff we’re talking about.

I’m Harley, and I’ve been on the kink scene for slightly over ten years. Ten years ago I was 23 and lived in Cornwall, and there wasn’t a whole lot going on work-wise, so I became self employed. I’ve made various things in that time. I made whips and other impact toys from paracord, I made clothing, and still do from time to time. But about 6 years ago I moved to London, and that’s when I got back into what, when I was at school, were called Resistant Materials. That’s metal, wood, and plastics. Being kinky, I started making kink stuff.

These days I’m based at my workshop in Croydon. I have a fabrication workshop and a woodshop, in addition to a smaller sewing/office area. I make heavy restraints and bondage gear, dungeon furniture, and various other things, including a popular range of queer Identity Tags and other accessories. 

I also do some building work- the kind where someone wants a trapdoor building into their living room floor and a cage built underneath, and wants someone who understands to build it for them, and thus save them having to try and explain it to a builder.


New Products!

I’ve been very busy in the workshop lately, making a bunch of new heavy steel restraints.
 

Adjustable Industrial Manacles

One.jpg

(Modeled by the wonderful Faerie Willow)
There are two major problems with steel manacles, as I see it. Firstly, they’re expensive, and secondly, they’re not adjustable. I set out to try and do something about that; by using commercially available U-bolts I was able to keep the price down, and the threaded components of the U bolts give great adjustability, to the extent that I believe two sizes will cover more or less every size of wrist and ankle! Check them out in the shop.

Collar Tags

category.jpg

My pronouns tags have been tremendously popular for me over on Etsy. This month, I’ve brought them to my website, and also added a range of steel Collar Tags. Any text (that will fit) can be put on a tag, which can then be attached to a collar with a custom stainless steel jump ring. I’ve already had several personalised custom orders, and orders for double sided tags. This is all included in the price- just £10 for a tag, with free UK shipping from the website! These could be the perfect stocking filler for your sub, or yourself- order yours here!


Foldable Steel Stockade

IMG_20201112_125429904.jpg

In addition to the cost and lack of adjustability I mentioned before, another problem with steel restraints, particularly things like spreader bars, is that they can be large and awkward to store or transport. That inspired me to make the Steel Stockade- once again, U-bolts keep the price down, and 40x5mm steel bar folds in half on a robust hinge, and is then held rigid when the central collar U bolt is secured. Buy yours here!
 

Christmas is coming!

I KNOW I haven’t really been on top of it either- it’s been a weird year, to say the least. It’s true, though, it’s now less than a month to Christmas. If you use code “HWCHRISTMAS” at checkout, you’ll get 10% off any order.

Also, I'm very happy to announce that, in the absence of an in person Queer Fayre this year, there's an online one instead, in conjunction with WitchyWomxn. Head over to their website to see what that's about.

 That brings us to the end of the first monthly HarlequinWorks Monthly Upate! Remember, sign up to the mailing list to get next month’s news and offers early!

Thanks very much for reading; see you next month/year!

A Spinner for Faerie Willow

Making stuff is fun, but making stuff for toppy people that you have a crush on? Even MORE fun. The lovely Faerie Willow wanted a spinner for playing games on her OnlyFans (and with me 😍), and one mustn’t keep a Princess waiting.

The spinner is to be heart shaped, and made of steel. That means it’ll need to be cut with the plasma cutter, and that means I’ll need a template, so the first stop: woodshop.

I found a vector image of a heart and printed it out, then transferred it onto some scrappy 3mm plywood

I found a vector image of a heart and printed it out, then transferred it onto some scrappy 3mm plywood

I cut out the heart on my bandsaw

I cut out the heart on my bandsaw

That done, it was time to use what is possibly my favourite machine: the plasma cutter pantograph tracing table. This machine, that I built last year, uses a pantograph to transfer the movements of a scribe perfectly to the plasma torch on the other side. This allows wooden patterns to be used without catching fire, and keeps me a little further from the plasma arc. You can see a video of it in action here.

Template on the left, steel sheet on the right.

Template on the left, steel sheet on the right.

There’s always a bit of fettling to do after plasma cutting- knocking off the slag and tidying up the edges and such. Then it turned out that for some reason the mill scale on this particular piece of steel was super hard, so I had to painstakingly grind it all off. Once that was done, I had this:

<3

<3

The heart needs several holes drilling in it: A clearance hole for the central 12mm shaft on which the pointer will rest, two mounting holes for the bearing that holds the shaft, and then three holes to tap for an M6 thread to hold the machine screws that the whole thing will stand on. My new compound table in the drill press, coupled with a centre I made in the lathe, makes it so easy to accurately line up on punch marks. That’s something I always used to struggle with before.

Also I thought the reflection was cool.

Also I thought the reflection was cool.

Then I tapped the three holes for the legs. With a locknut on each, these socket head capscrews make nice feet that won’t scratch surfaces.

I I I

I I I

With the body of the spinner done, it’s time to make the part that actually spins. I used a piece of brass flatbar for this. I cut it to length filed it, put a nice point on the end with the disc sander, and then drilled and tapped a hole in the centre of it, where it would mount to the shaft.

The pointer cut and polished, before being drilled and tapped.

The pointer cut and polished, before being drilled and tapped.

Next, in order to make the shaft, it was over to the lathe, which is another of my favourite machines. It’s an absolute beast, made in Germany in 1938, and I think I’m only its third owner.

I faced the end of the shaft, and turned it down to 6mm so I could cut an M6 thread on it with a die.

Leinen D23LZ, for those interested

Leinen D23LZ, for those interested

A 12mm shaft with an M6 thread, ready to randomise!

A 12mm shaft with an M6 thread, ready to randomise!

With that done, it was time for final assembly! A flange bearing was bolted in place using the holes drilled earlier, and the pointer was screwed onto the shaft, which was then fastened in the bearing. A quick clean and some clear lacquer, and it’s ready to decide some fates! A big thank you to Willow for allowing me to make this for her.

FinalGif.gif

Building a Roll Bender, Part 2

(Read part one first!)

This is the second, and mostly final, post documenting my roll bender build.

The first step in this segment was to bolt the top piece of channel in place, and then add some mounts for the return springs to it and the carriage.

For the mounts I used some scraps of 12mm round bar, and the springs came out of an IKEA sofabed that I found dumped on Forest Hill a few years ago.

the picture is slightly blurry because there was condensation on the lens from my cycle down

the picture is slightly blurry because there was condensation on the lens from my cycle down

Next, the central shaft needed cutting to length, and a flange adding to support the handle. I could have just welded the handle to the shaft, but this way if I need to put the shaft in the lathe at any point in the future, it’ll be no bother.

I used a little collar to support the flange while I tacked it in place, and then welded it out.

flange in position, with a bevel on the shaft

flange in position, with a bevel on the shaft

looks a bit like a laurel wreath

looks a bit like a laurel wreath

The next step was an interesting one. I needed a keyway in the shaft. A keyway is a slot cut axially along the centre of the shaft, and a corresponding slot is cut in whatever you want the shaft to drive. A “key”, which is just a piece of square section stock of some kind, fills the slot, and ensures that the shaft drives the thing you mount on it, in this case the central die of the machine.

I’d never cut a keyway before, because that’s something you need a milling machine for, and when I briefly owned a milling machine it wasn’t really up to the job. However, lathes can be used for milling, by mounting a vertical slide on the carriage and putting the cutter in the spindle. My lathe has a full set of collets, which is ideal for holding cutters. I didn’t have a milling slide, though, so I had to improvise.

shaft clamped in the toolpost; I was surprised this worked as well as it did

shaft clamped in the toolpost; I was surprised this worked as well as it did

I was honestly amazed at how well this worked! Cutting like that where the work has nothing behind it to support it is not a very good idea, but this lathe is amazingly rigid, and the little V-block thing I knocked together worked remarkably well.

i did it keyway

i did it keyway

I then had to file the corresponding keyway into the die using a hand file like some sort of cave person. Once I have this machine running properly and the lathe properly set up for milling, I’ll set up a way of broaching them, which will be much quicker. I’m pleased with the result, though.

keyed shaft, keyed die, key

keyed shaft, keyed die, key

All that was left to do was assembly! I had a bit of a problem at this point- never having used a keyed shaft before, I hadn’t considered the issue of getting the key into the keyway on the shaft, and then getting the die onto the shaft, all while it was constrained by the bearings. In the end I cut down the key to a length that I was able to squeeze in. I’ve since realised that it is possible with a full length key, but I’ll need to extend the keyway to the end of the shaft.

IMG_20200813_183501732.jpg
final assembly

final assembly

I found a few pieces of 25mm square tube (thin wall, so not especially taxing) in the skip, that already had a slight bend to them, so I dug them out for testing. Getting the balance right between too little pressure and too much is tricky, because in either case the drive die slips, so it’ll take a little practice.

This machine should be able to bend tube of up to 50x50mm with a 3mm wall, which is hefty stuff. When I have it all properly finished, I’ll upload a video of it in action.

I still need to do a few things, like making a way for it to bolt to the table, and building a proper handle to hold on to. Overall though, I’m extremely pleased with the result.

IMG_20200813_182848336_BURST000_COVER_TOP.jpg

Building a Roll Bender, Part 1

This pandemic isn’t going away, so I decided to try a careful return to the workshop a few weeks ago. I cycle to and from, so there’s no public transport, and once I’m there the only sticking point is the shared toilet, but overall it’s been going well. I don’t have a lot of work on at the moment, and I’m not keen to take on any big orders right away only to find a problem with a supply chain or something, so I’ve been working on an infrastructure project I’ve been meaning to do for a while; an improved roll bender.

I have a tiny roll bender, one of the common Chinese ones that will do a maximum of 25x3mm flat, or about 6mm round bar. It’s really good for this smaller stock, but I wanted a bigger one. Bigger ones are catastrophically expensive, or not very good, or both, so I decided to try and build one. I wasn’t much good at fabrication then, and this is what I ended up with:

look at this nonsense

look at this nonsense

The lower carriage would balance precariously on a 2 tonne bottle jack, while the upper bearings were static. Sound in principle, in that the two lower rollers moved in opposition to the upper roller, but the span of the upper shaft was far too great, and given the poor alignment I achieved when mounting the bearings, under pressure the whole thing would twist, which will probably result in rolling a helix or something rather than a circle. It did manage to do this to a piece of 40x10mm steel flat bar, though:

“I’m straight.” “So is 40x10mm steel flat bar until it gets rolled into a semicircle by a questionable machine”

“I’m straight.” “So is 40x10mm steel flat bar until it gets rolled into a semicircle by a questionable machine”

Anyway, it didn’t work very well and then it sat under the welding table for a couple of years, unfit for purpose, before I decided building a new one would be a good project to get me back into the workshop life.

Day One

The first thing I did was to take all the bearings off the original machine, and clean them up. These were the only part I paid for (I think it was about £80 for all six); the rest was all made from scrap I had lying about.

Then I had a dig through the steel I had on hand to see what I could build the new machine from. When I built my welding table, using 150x10mm flat bar slats for the top, I ordered ten lengths from my supplier, but two of the ones I got sent were badly bent which is no good at all for a welding table. My supplier sent out some replacements, but didn’t want the bent ones back. The bends in this case were perhaps 3mm out at most, so they were still usable for less critical applications, and I put them to one side. Now their time had come. I also had some 40x10 and 50x10mm flat bar, though not enough of either to avoid having to mix and match. I did some cutting, and laid the bits out on the table to get a rough idea of how it would all go together.

the red thing is the bottle jack that will provide the bending force in the finished machine

the red thing is the bottle jack that will provide the bending force in the finished machine

I wanted to have two possible positions for each of the lower bearings, to allow for a greater range of radii that I could bend things to. Meanwhile the two upright bars would provide a track for the upper shaft to ride in, and be in tension as the bottle jack pushed the upper bearings down. I ground some bevels on the ends of the uprights for welding, and then started marking out and drilling the holes in the lower plates. To make sure the hole pattern aligned correctly in both parts, I tack welded them together and drilled through them both at once.

The bolt holes for the lower bearings, plus the pilot holes for the shafts.

The bolt holes for the lower bearings, plus the pilot holes for the shafts.

I now needed to drill clearance holes for the shafts, but for that I needed a 26mm annular cutter, which I didn’t have, so I drilled out pilot holes and left it there until I could order the cutter.

I then made up the plate that would hold the upper bearings, and against which the bottle jack would push. From the previous bender I had two pieces of plate with holes drilled to accept the pillow bearings, so I just took those and welded a new plate between them to make them into one piece.

the upper bearing carriage ready to be welded up

the upper bearing carriage ready to be welded up

That was about as much as I could do without the annular cutter, so I ordered it, did a test fit of the bearings, and left it at that for the day.

the upper bearing carriage with bearings in place

the upper bearing carriage with bearings in place

Day Two

With the new annular cutter ready to go, I got started drilling out the clearance holes for the shafts (in the front frame only, since I only need to be able to remove them in one direction). I then drilled smaller holes concentric with the shafts in the back frame, for pushing the shafts out from behind, and also some central holes near the top of each frame which I then cut out into slots, which I would need in order to bring the carriage down far enough to bend tighter radii.

H O L E S

H O L E S

Next, I clamped everything in place, and welded in the uprights, taking care that the uprights on each frame lined up with the other, and had a consistent gap between them, to allow the upper shaft to move freely up and down, but not side to side.

the two frames- note the narrower 40mm flat bar for the front uprights, vs. the 50mm in the back

the two frames- note the narrower 40mm flat bar for the front uprights, vs. the 50mm in the back

I wanted some kind of support to stop the uprights flexing side to side, so I dug through my scrap pile. I found some scraps from a job where a customer wanted a mitred frame made from 150x12mm flat bar, so the 45 degree offcuts were just right after a little neatening up. At this point I decided to put the shafts in place, and the central carriage, for a test fit:

the carriage is resting on a scrap of flat bar resting on the lower shafts, which is what you see sticking out at either side

the carriage is resting on a scrap of flat bar resting on the lower shafts, which is what you see sticking out at either side

Everything fit very nicely, which was tremendously pleasing, so I cut some more parts- two end pieces to join the frames together on either side of the base, and a few bits of angle and some channel to form the top of the frames, which the bottle jack will push against. The angle I welded in place, but the channel will be bolted- once I’ve rolled something into a circle and the ends meet, I’ll need to be able to remove it from between the frames.

And that’s where we’re up to! Next time, I’ll bolt the channel in place, build the mount for the bottle jack, as well as for a return spring, cut a keyway in the central shaft, make some dies, fashion some kind of handle to drive the whole thing, and start bending!

everything in its right place

everything in its right place

once the carriage and jack are in, this will be the last thing the steel sees before it stops being straight forever

once the carriage and jack are in, this will be the last thing the steel sees before it stops being straight forever

Part 2 is now here.

HarlequinWorks in the Pandemic

So there’s a pandemic on. I can’t currently get to the workshop safely, although I’m hoping that might change soon. My etsy shop and website shop are closed for the time being.

I fully intend to return to work as soon as I safely can, but I also don’t think that following the government’s guidance (I should never have stopped work, according to them) is a sensible thing to do.

Livetweets

A lot of people who do the sort of thing I do seem to make youtube videos. I'm no good at video editing, and unless I have someone there to film me, I can only imagine it would take a whole lot longer to film a build than just to do it.

However, I think other people's build processes are interesting, and I wanted to document my own, so I started taking pictures as I went, and tweeting them. Here is a list of the livetweet threads I've done so far; click on the links to see them on twitter- you don't need a twitter account to do this.

Building a tray storage unit

Building a unit to house IKEA trofast storage trays.

Stretchy dress alteration

Altering a dress found in a charity shop to fit me.

Milling machine stand reinforcement

Reinforcing the milling machine stand I fabricated so it wobbles less.

Hexagonal manacle build

Building some hexagonal manacles from steel flat bar.

New light for welding table

Fabricating a fancy steel light for my welding table.


Pronouns, Identities, Tags, Patches

I started making my steel identity tags sometime around May. Shortly after that, I started selling them at London's Queer Fayre, as well as a few kink events, and on Etsy. They've since become my most popular items, particularly the pronoun tags, which has been tremendously gratifying. it's really cool that something I made can become a core part of someone's identity.

theythem

Towards the end of last year, I realised that while steel is great, it's not the only thing one can put words on. I bought myself an embroidery machine, and started playing with it. Enter: Patches.

Rather less understated, it's true, and not quite as original, but I've been very pleased with the way they're coming out, and they're a lot more colourful than steel. They're a little less hands on than I normally like my products- it's a matter of programming the embroidery machine, loading up the fabric, and pressing the start button, which is not a particularly enjoyable process, but it is efficient, and I do love efficiency.

Head on over to the Etsy Shop if you'd like some. I can put everything I can put onto a tag onto a patch, plus I can do fancy colours!


Censorship

This one isn't about making stuff. It's about politics, which I usually stay well clear of.

I, and many of my friends, look at all kinds of weird porn. Weird, but made by and involving consenting adults. Many of you may not look at porn at all, weird or otherwise, and so think this doesn't affect you. I guarantee, however, that if they censor porn, it will not stop there. This is how governments remove freedoms- they begin with the fringe groups. First, they come for our porn. If you do nothing, they'll come for your liberty.

There's a petition.

Metalwork

About 18 months ago I was given an arc welder, an angle grinder, and a host of other old tools by my cousin, who was moving house. I was scared of the welder for a bit, but on my birthday last year, trying hard to avoid working, I took it outside, and plugged it in. It sort of exploded, and knocked out the power, but I took it apart, and rewired it, and then it worked fine.

I started teaching myself how to weld, and for a long time I thought I just wasn't very good at it. Then I bought some decent electrodes and started storing them properly, and my welding improved a great deal. On a fabrication job, my welder kept overheating, and I realised that I'd need a new one. At Harlequin Works, "new" invariably means "new to me but much older than I am", at least when it comes to tools. I bought a Pickhill Bantam, an old oil cooled welder, and that knocked out the power the first time I used it too.  This time I needed to build an inrush inhibitor, to prevent it drawing too much current when it was turned on, and now it, too, works fine, and much better than the old one.

Today, I took delivery of a lathe- it's a step that many metalworkers seem to take, from fabricator, to machinist. The lathe increases the capacity of my shop a great deal. Jobs that were fiddly or impossible before will be easy now, and if I need a part for something, I can almost certainly make it rather than buying it.

People who use tools laugh when I say this, but that's the last big tool, really. Perhaps one day I'll get a milling machine too, but from here, the shop is more or less complete, and any new tools will be upgrades.

HarlequinWorks, Formerly abeautifulpalegreen

Welcome to HarlequinWorks. Historically, I'm rubbish at keeping blogs updated.

I'm Harley. I make things for a living. I work with a number of different materials and techniques, on the basis that the more things I know how to do, the more things people can pay me to do.

There'll probably be posts on a variety of subjects here, including, but not limited to: making stuff, kink, travel, adventure, motorcycles, London, music, and gardening. If you'd like to read about the things I've done in the past, take a look at my old blog.

My partner, an illustrator, once asked why I make things. I couldn't really answer, and asked him why he drew things. He said "it hurts not to".